Introduction
This guide is designed to help scientists use the Moisture and Density (MAD) interface called MADMax. For detailed information on the MAD procedure, please refer to the MAD User Guide.
NOTE: Please have a technician give you an overview before using this instrument.
Procedures
Preparing the Instrument
Starting MADMax
Click the icon for MADMax on the computer desktop and Login to LIMS (Figure 1).

Figure 1. MADMax Icon.
Making a Measurement
Measuring Mass (wet and dry)
- When the User Interface appears (Figure 2), click the dropdown arrow in Currently Viewing Results For field and choose the method for determining MAD values.
Generally, METHOD C (Wet Mass, Dry Mass, and Dry Volume) is used onboard; for a description of methods please review the Methods section in the Moisture and Density User Guide.
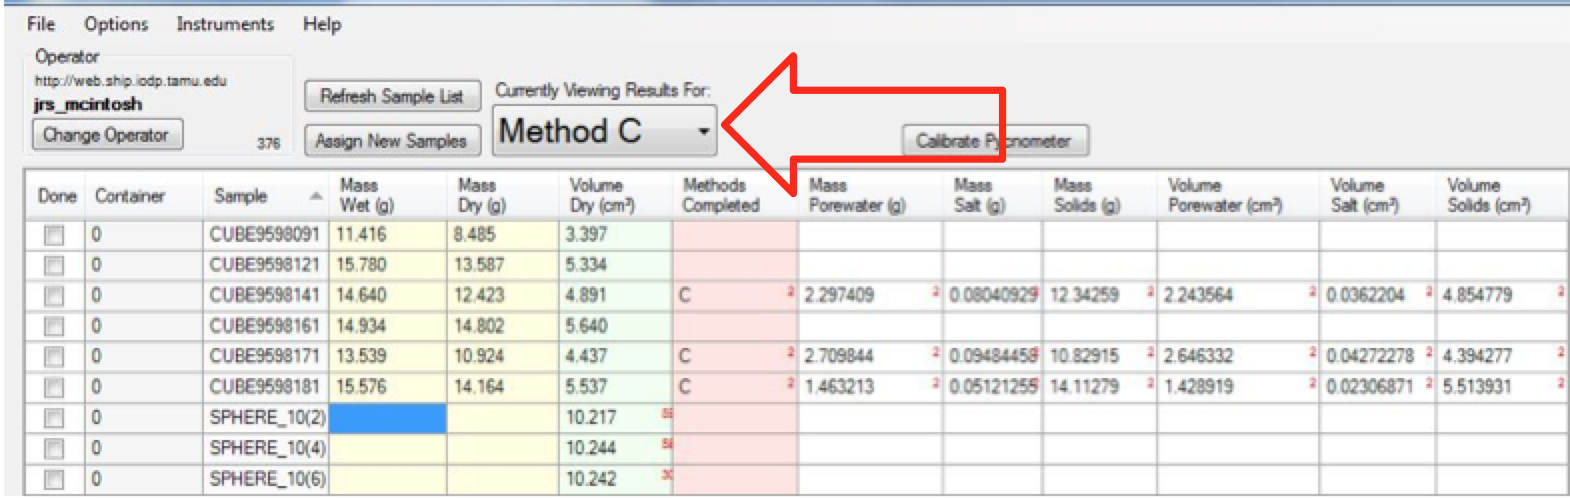
Figure 2. User Interface Screen.
2. Measuring Mass Wet: In the tabular data sheet find the sample to be analyzed and double click the Mass Wet (Figure 3) cell for the particular sample.
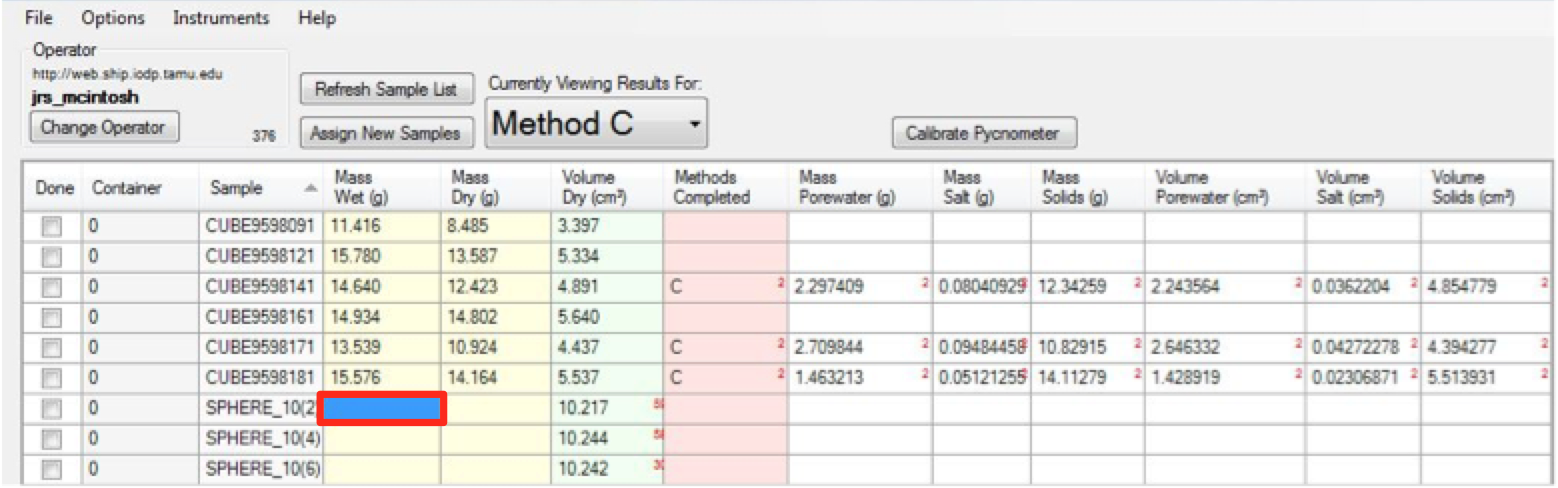
Figure 3. Mass Wet.
3. A prompt window opens to verify the sample being measured as well as the container number; ensure that both are correct. Further down there is the prompt for the number of mass measurements to be averaged (the general number of measurements is 300; note: if sea state increases increase number of measurements for better accuracy) (Figure 4).
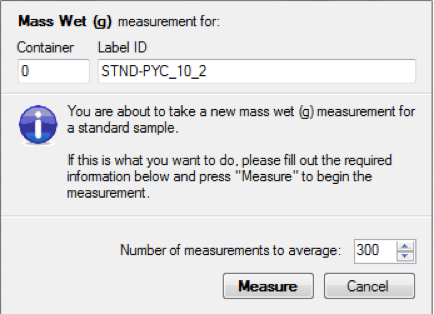
Figure 4. Number of Measurements.
4. Click Measure. This will bring you to the "measuring window".
5. Balances need to be tared if they have not been used for over 6 hours or if anything has changed (e.g., a spill was cleaned up). Tare the balances with both pans empty. Once the tare is complete, the user can weigh reference masses to ensure the balances are working properly.
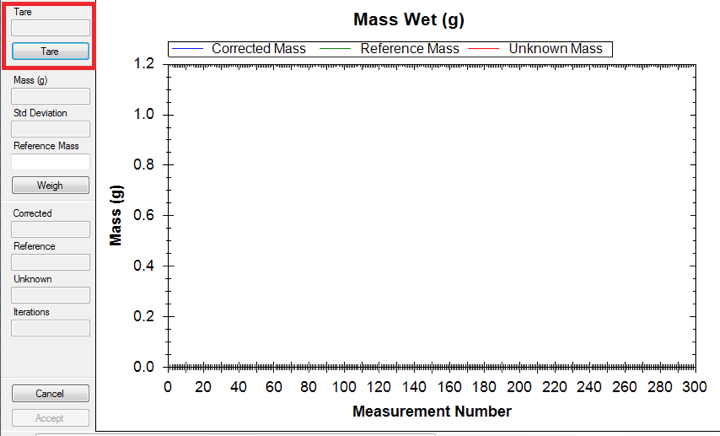
Figure 5. Tare the Balance.
6. Once the balances have been tared, place the reference weight on the 'Reference' balance and the sample on the 'Unknown' balance. Enter the known mass of the reference weight in the Reference Mass field (Figure 6). Use a reference weight similar to the weight of the sample + container (20–30 g). Click Weigh. The difference between the 'Reference' and the 'Unknown' mass should be less than 5 grams, if it is more click Cancel and change the reference weights. Important: Don't touch the reference weights with your hands. Use the tweezers.
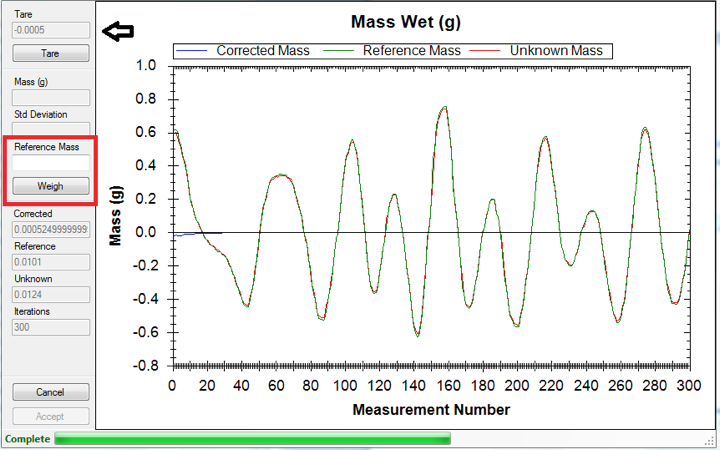
Figure 6. Weigh Sample.
7. Once the measurement has been completed and the user is satisfied, click Accept (Figure 7). Note that the Mass Wet field is now populated in the tabular data sheet.
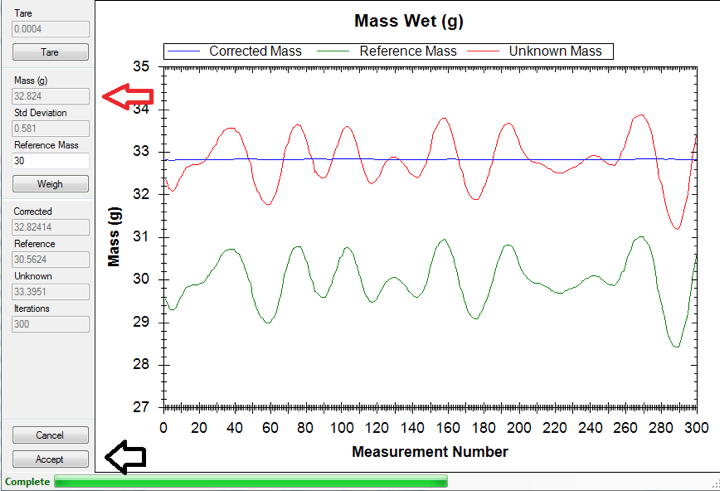
Figure 7. Accept Weight.
8. After Mass Wet has been measured, place sample in oven to dry for 24 hr. The samples must be cooled back to room temperature before measuring the dry mass! Leave them in the desiccator for about 3 hours.
NOTE: Double check the proper operation of the oven and its power plug. Sometimes the power plug can unlock itself and cause an error due to power failure! Of course, an oven also presents high temperature hazards.
9. After drying the sample, measure the Mass Dry. Double click the Mass Dry column in the correct sample row (Figure 8). Once the sample ID and container number are verified, click Measure. From here repeat steps 5–7 listed above. Make sure to write the data also into a corresponding log sheet (same with data for the drying and pycnometer working steps).
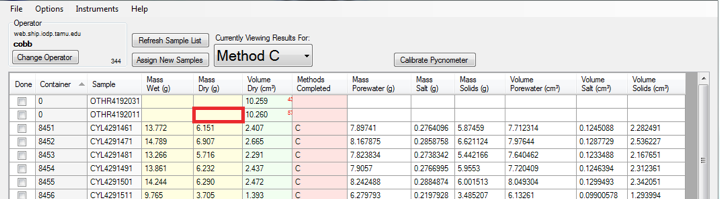
Figure 8. Measure Mass Dry.
Measuring Volume
- After measuring Mass Wet and Mass Dry, the dry volume can be measured. (Be sure to let your samples cool in the desiccator before analyzing in the pycnometer or making the dry mass measurement.
2. Double-click on the desired sample cell under Volume Dry. The prompt to verify sample ID and container number will appear; check to ensure they are correct.
3. Choose the pycnometer cell number to be used for the sample measurement (Figure 9). Place the sample in the selected pycnometer cell, and tighten the lid. Enter the number of measurement cycles (generally 3 measurements is acceptable). Once all parameters are set as desired and the sample has been entered into the chamber, click Measure.
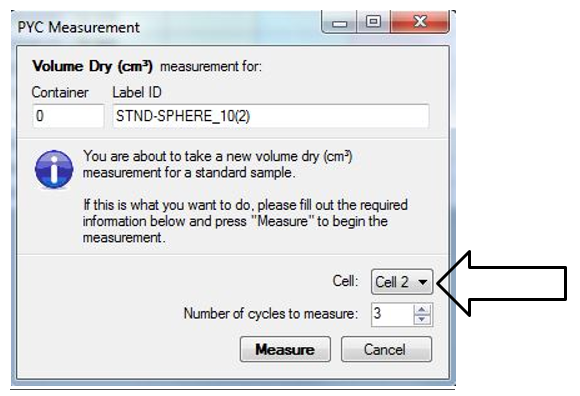
Figure 9. Choose Pycnometer Cell.
4. The Volume Dry measurement interface will appear (Figure 10); to begin measurement click Start. This will initiate the pycnometer analysis; the process will automatically run through the total number of cycles selected in Step 2.
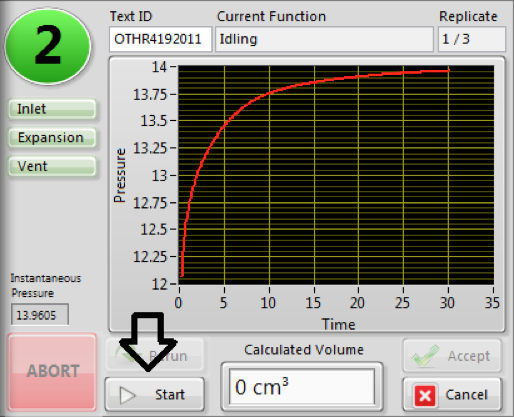
Figure 10. Volume Dry Instrument Interface.
5. Once the measurement is complete the Calculated Volume interface will appear. If this volume is acceptable click Accept; otherwise the sample can be reanalyzed by choosing Rerun (Figure 11).
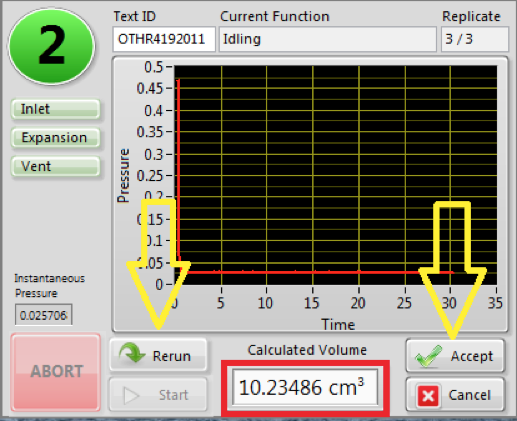
Figure 11. Calculate Volume Interface.
6. Note the Volume Dry field is now populated with the newly calculated volume.
7. Under the Methods Completed column, double-click the cell for the particular sample run (Figure 12) to bring up a prompt for MAD Calc. Ensure that container number and sample ID are correct and click Run MAD Calc (Figure 13). This calculates the remaining data for the sample being measured (i.e., Mass Pore water, Mass Salt, Mass Solids, Volume Pore water, etc.).

Figure 12. Methods Completed.
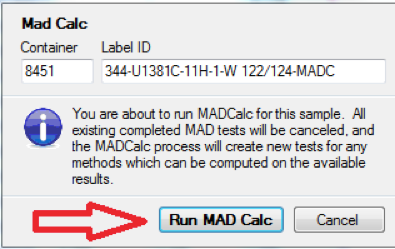
Figure 13. Run MAD Calc.
8. Expand list of parameters of choice in the result by clicking on one of the visible parameters (e.g., Mass Solids (g)), which opens a list with all the variables. These variables can be dragged per mouse click from the left to the right hand side.
9. A standard should be run within each cycle measurement between cell 1-6. Please also remember to fill in the log sheet in Excel. The log sheet is very important for figuring out what went wrong.
Upload Data to LIMS
Data is automatically uploaded into LIMS once the MAD calc is complete (this includes any recalculation). Check the MAD LIMS report to verify.
Important Notes
- Use this only in the case of entering samples not already listed, as MADMax downloads samples directly from Sample Master.
Click on Assign New Samples (Figure 14) to load new (or old) samples into the tabular data sheet, which then allows a User to enter/scan sample label, verify the sample, then add it to a list of selected samples (Figure 15). By pressing OK the sample is added into the tabular data sheet.

Figure 14. Add Sample.
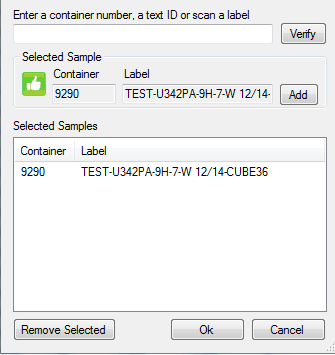
Figure 15. Add Sample.
NOTE: If wet/dry mass is reversed, user can right click in either (wet/dry mass) cell to swap the result, remember to recalculate under Method Competed.
- When the User Interface is opened there is also a Status Bar that appears (Figure 16). This bar is mainly for troubleshooting purposes or use by a Technician. For the best operation experience with software, please click Display ON upon opening the program to turn off the Status Bar display.

Figure 16. Status Bar.
- The individual pycnometer cells can be calibrated by clicking on the Calibrate Pycnometer button on top of the MADMax user interface. Dialog windows open, which guide the User through the next working steps in an easy-to-follow manner.
Calibration data is logged inside an EXCEL sheet that is either on the DESKTOP and/or server. It is imperative to log this data and keep track of the calibration to assure high-quality measurements throughout an entire expedition! Ask the PP technician for further instructions to learn this important skill. It is simple to learn, but essential to your success!
Credits
This page was created by Lisa Crowder on July 30, 2018. Credits for subsequent changes to this document are given in the page history.
All improvements to the Quick Start Guides and User Guides are a communal effort, with honorable mention to the group of LOs, ALOs, and technicians who have helped.
Archived Versions
MAD Quick Start Guide - 27Sept2022
MAD Quick Start Guide 2020 (*.pdf)
1 Comment
Unknown User (25dbb4e563432e130164eb68f519000c)
Aug 05, 2018Reviewed by Nicolette 6 August 2018