Introduction
The Section Half Multisensor Logger (SHMSL) makes point-source, contact measurements of magnetic susceptibility and color reflectance; as well as a surface laser profile. Split core surfaces, predominantly from the archive half, are measured.
Procedures
Preparing the Instrument
- Double-click the MUT icon on the desktop (Figure 1a) and login using ship credentials. For more information on data uploading see the "Uploading Data to LIMS" section below.
- Double-click the IMS icon (Figure 1b). IMS initializes the instruments and checks the movement of both Exlar actuators. Once initialized, the logger is ready to measure a section.
![]()
Figure 1. (a) MUT Icon. (b) IMS Icon.
QE Pro Calibration
- The Instrument Calibration List screen appears automatically, after clicking start, if the QE Pro is out of calibration (Figure 2).
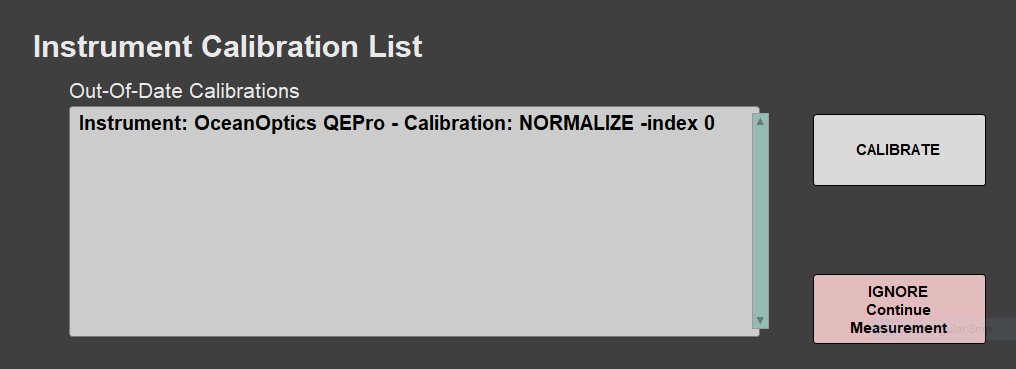
Figure 2. Instrument Calibration List window.
2. Click CALIBRATE to begin the calibration process, starting with the White calibration. The QE Pro integrating sphere lowers over the QE Pro calibration standard until contact. The Integration Time should be less than 0.55 seconds (Figure 3).
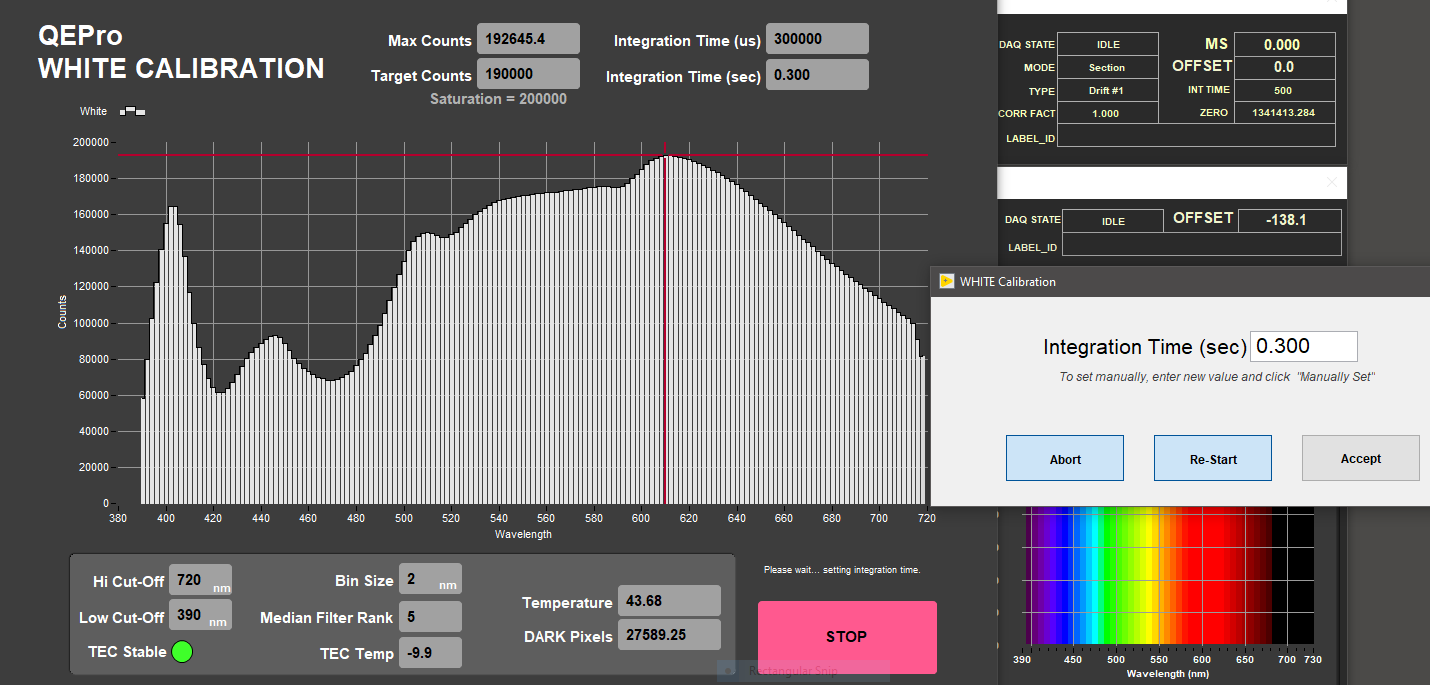
Figure 3. QE Pro White Calibration.
Note: If the integration time increases (i.e., reaches 0.55 and beyond), please contact the PP technician.
3. Click Accept.
4. After the White Calibration is complete, the Dark Calibration will begin (Figure 4). The difference between the calibration values of Dark Pixels and the Spectral Mean should be less than 100. If this difference is higher or if negative values appear on the spectrum, please contact the PP technician.
When finished click Accept.
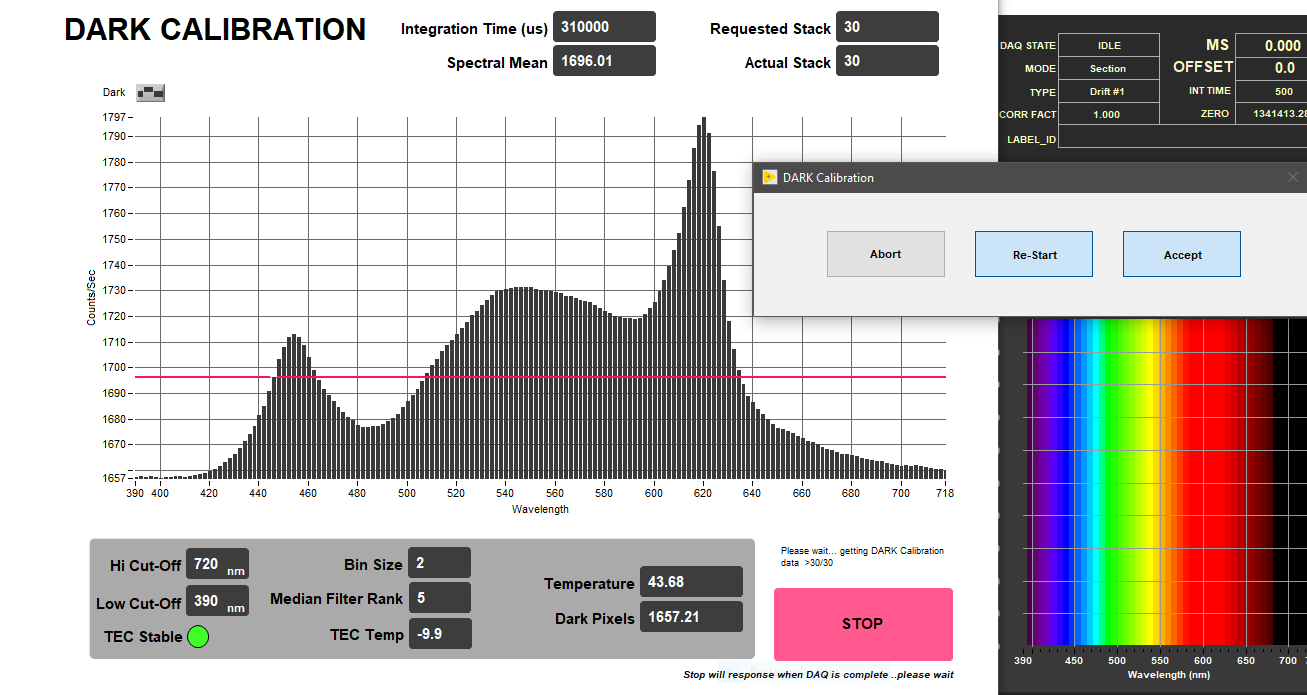
Figure 4. QE Pro Dark Calibration.
5. After the Dark Calibration is complete, the normalize spectra will appear (Figure 5). Click Accept to apply the calibration.
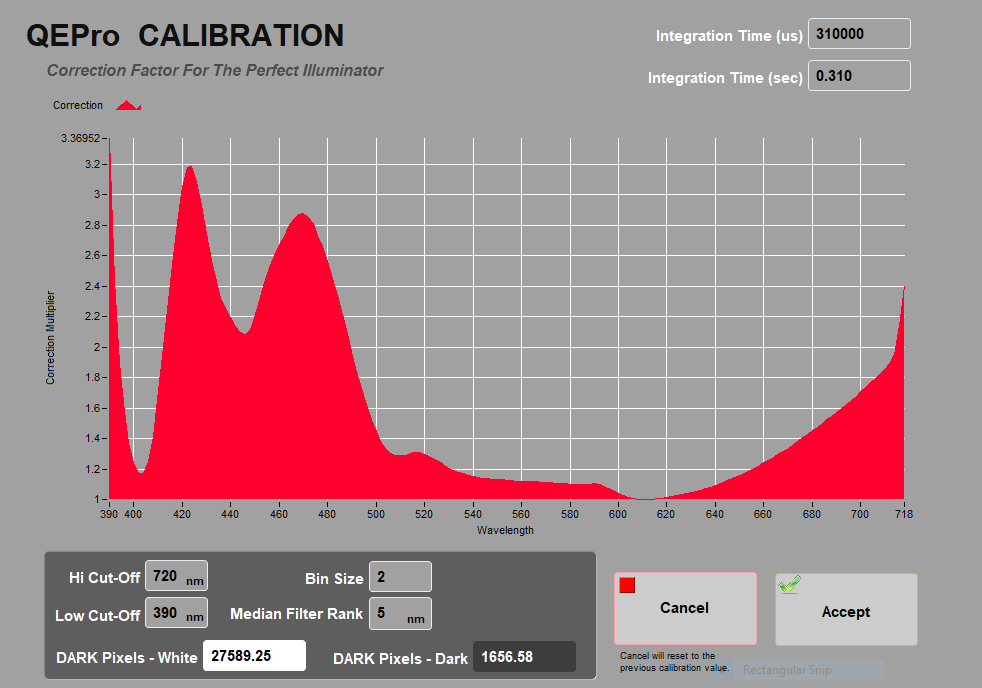
Figure 5. QE Pro Normalize spectra.
Making a Measurement
NOTE: If you would like to change measurement parameters, please contact the PP technician.
- Place section in the core tray. Make sure the section is oriented blue endcap towards calibration standards/benchmark, and is flush against the benchmark (Figure 6).
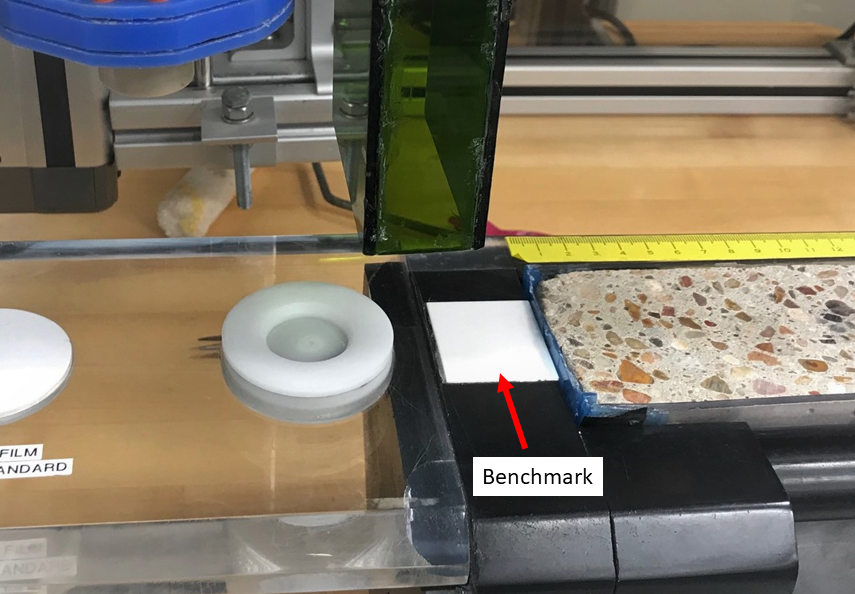
Figure 6. Correct core position.
2. Adjust the section so that it is parallel to the benchmark.
3. Click START. The Section Information screen is displayed (Figure 7).
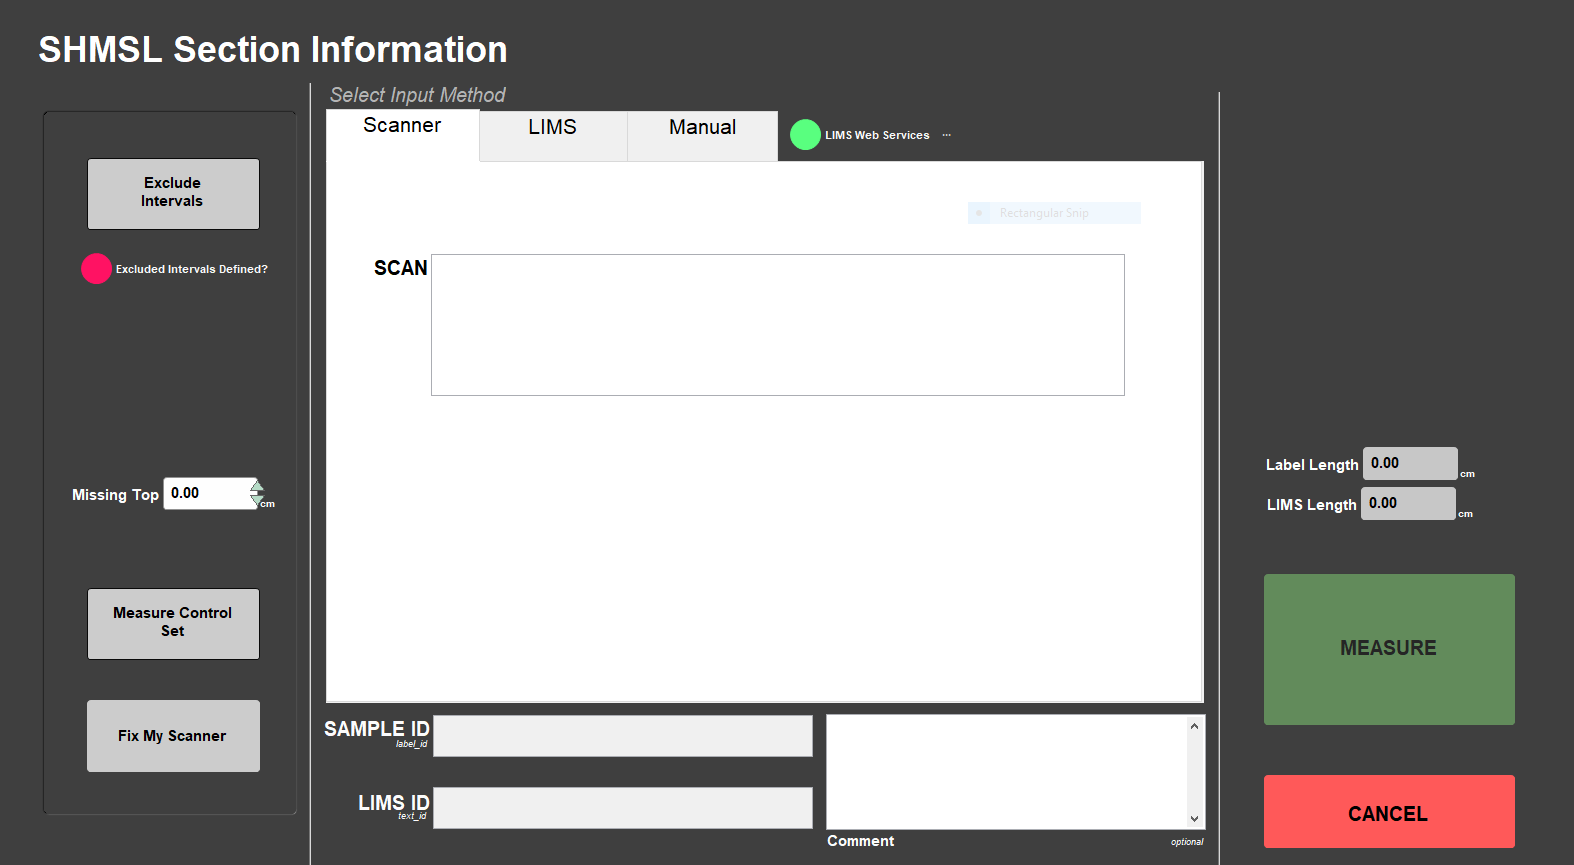
Figure 7. SHMSL Section Information Screen.
4. Place the cursor in the SCAN field and scan the section label. SAMPLE ID and LIMS ID automatically fills. This ID tag contains information on expedition, site, hole, core, section number and length.
Additional entry field options are the LIMS and MANUAL tabs.
Optional entry fields include:
Comment: Notes and observations.
Missing Top: Used if material is missing or was sampled at the top of the section. If used, the software automatically adjusts the offset.
Exclude Intervals: Enter section intervals to be excluded, like foam-voids. Excluded intervals will be not be measured.
Measure Control Set: Measurement control for the spectrometer. This option is used exclusively by the PP technician.
5. Click MEASURE.
NOTE: If the system prompts for a QE Pro calibration, please refer to the calibration instructions (shown above).
6. The sensor assemby moves to the bottom of section. A surface profile, taken by the laser, will be acquired (Figure 8).

Figure 8. Laser Profile.
7. After profile completion, a pop-up is displayed, containing the measured section length. Confirm this length visually (Figure 9) and adjust if needed.
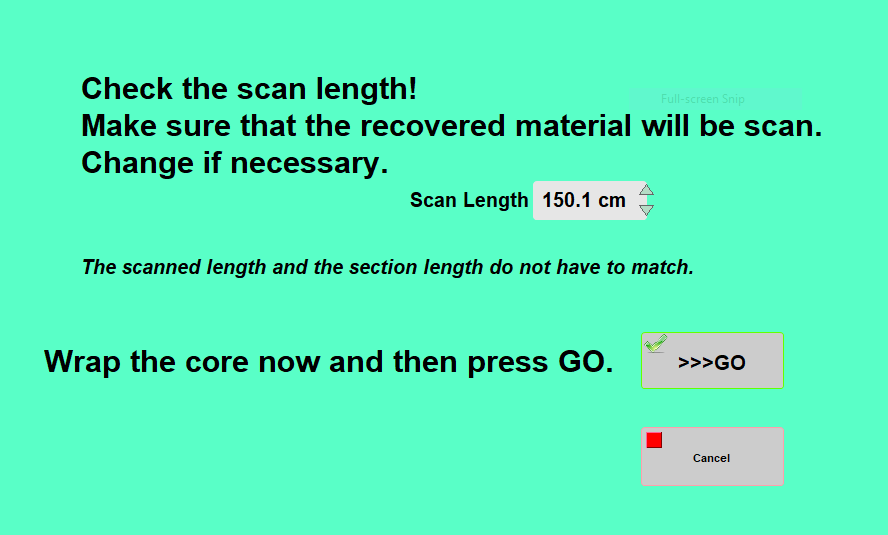
Figure 9. Confirmation length window
8. Using the pre-cut GLAD wrap, cover the section surface. Click >>>GO to begin MS and color reflectance measurements.
NOTE: Wrap MUST have a proper seal. Any bubbles or wrinkles WILL affect measurements. Sediment contamination within the sensors WILL cause DAMAGE.
9. MSP and Color reflectance data graphs are displayed in real time during acquisition (Figure 10).
NOTE: the QE Pro has individual display tabs for each component of the color reflectance. Display tabs can be toggled back and forth.
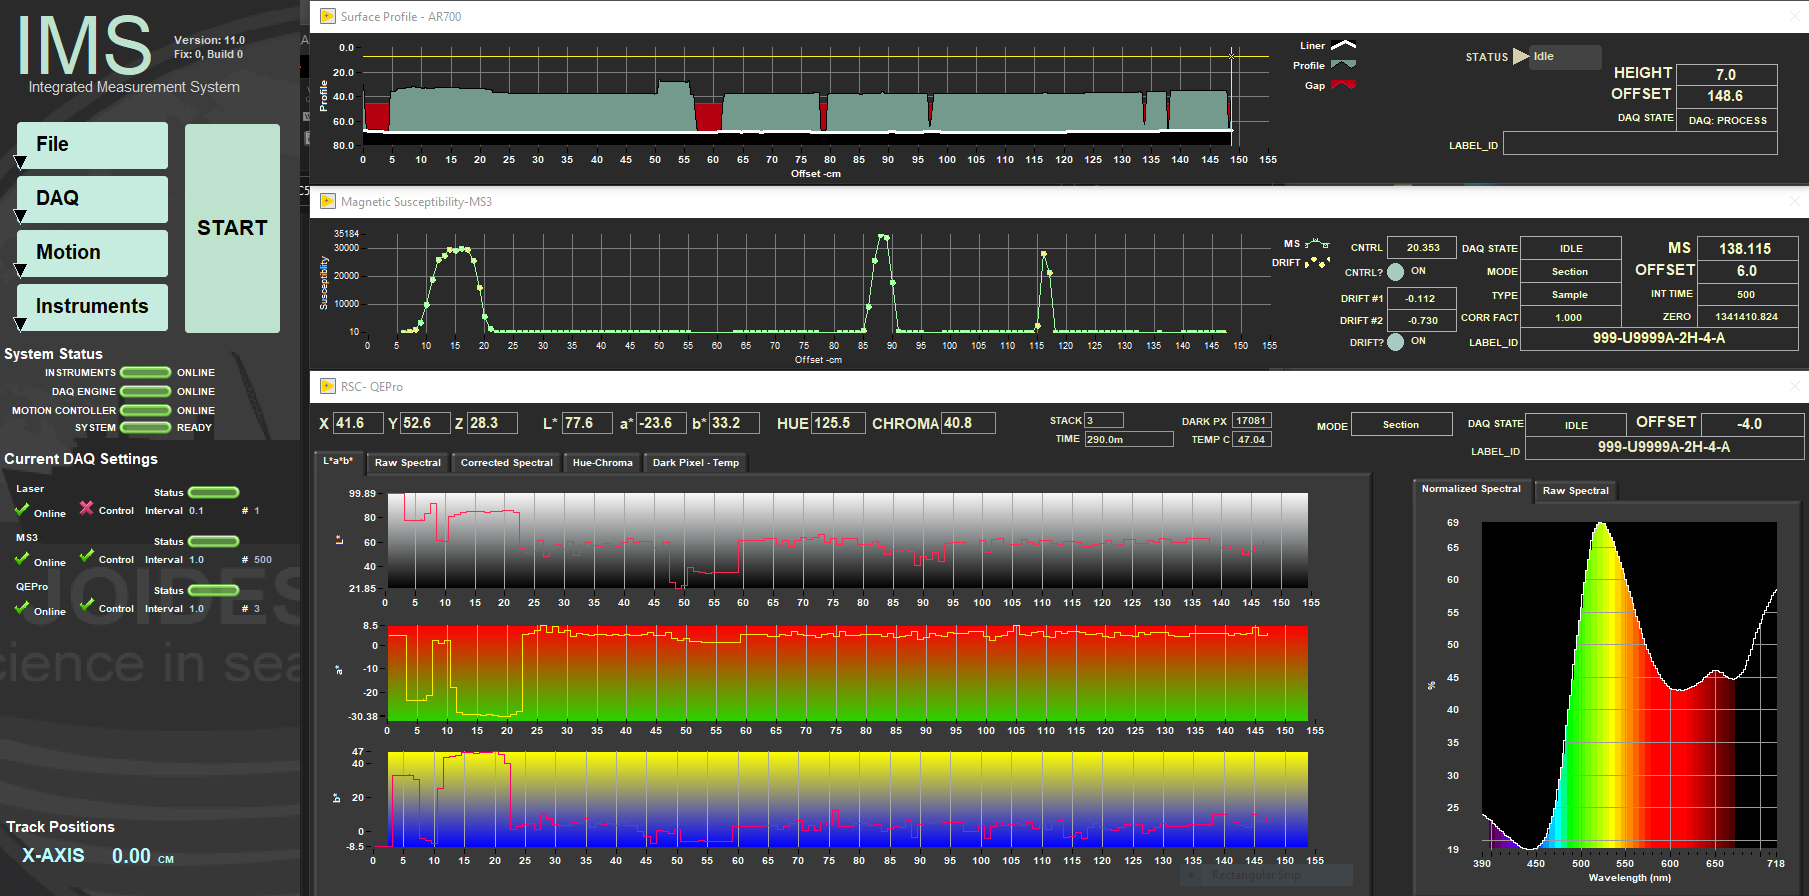
Figure 10. Laser, MSP and Color reflectance graphs.
10. After data acquisition, measurements of MSP (Magnetic Susceptibility Point) and white standard are performed. Placement of the sensors to their respective standard is extremely important. For the MSP measurement, this corresponds to the insertion of the sensor into the standard (Figure 11).
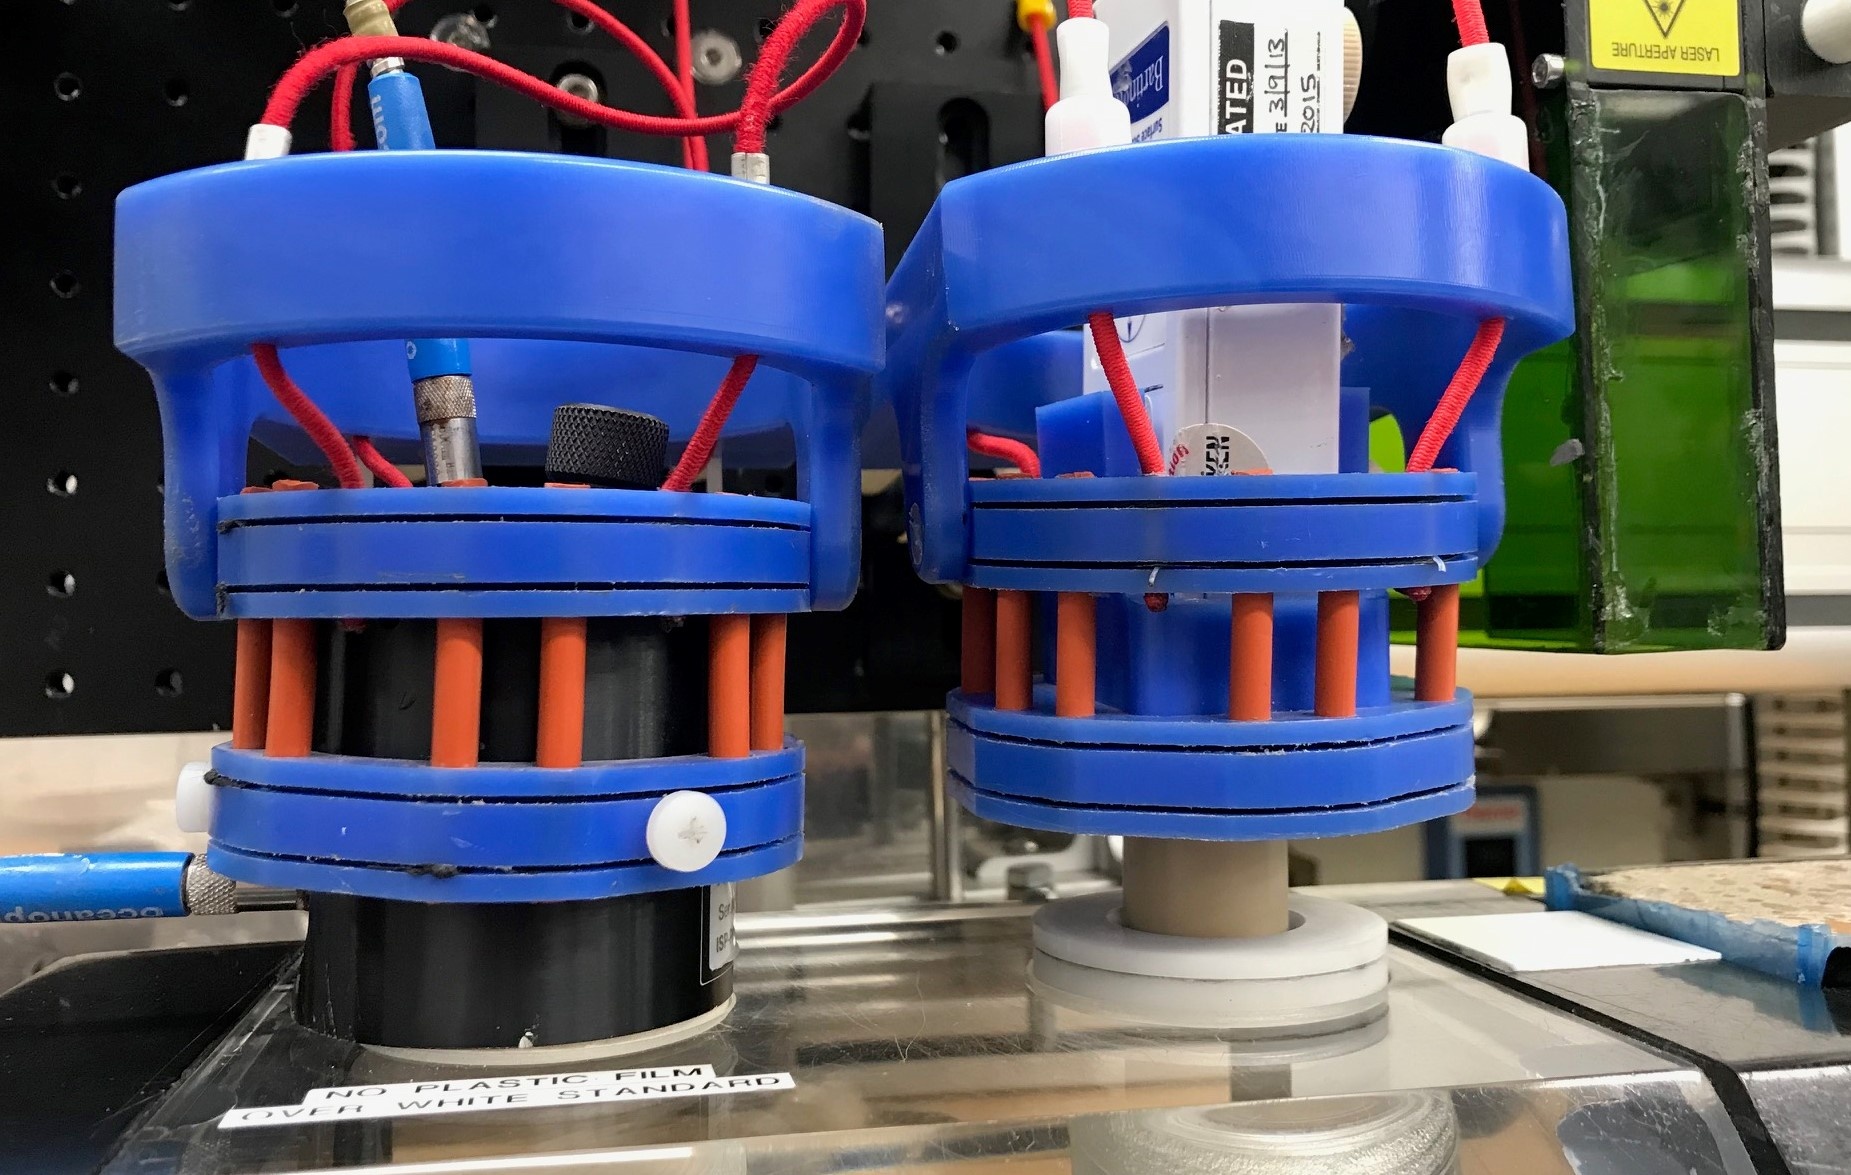
Figure 11. Correct position of sensor on the top of the standards.
NOTE: MSP data can be drift corrected if necessary. Please contact the PP technician for further instructions.
11. All instrument data (laser profile, MSP, color reflactance, and standards) are stored in C:\DATA\IN.
12. MUT is used to upload data to the LIMS database. See section "Uploading Data to LIMS" for more information.
13. Once uploaded, data is available to view on LORE and LIVE. If data is not instantly visible, please contact the PP technician.
Uploading Data to LIMS
- Click the MUT Icon. Log in using database credentials.
- Once activated, the list of files from the C:\DATA\IN directory is displayed. Files are marked ready for upload by a green check mark (Figure 12).
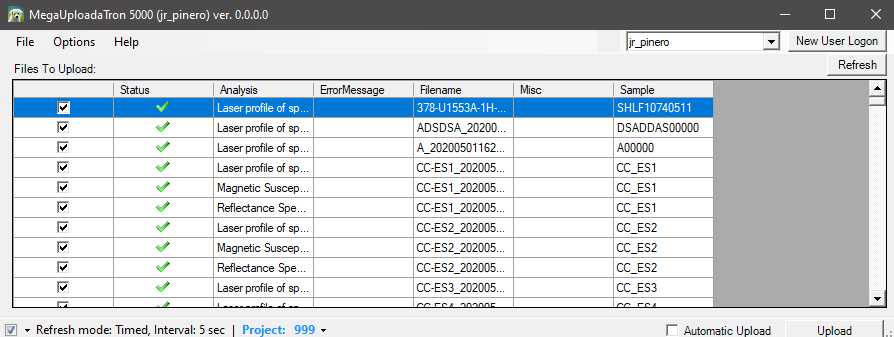
Figure 12. Main MUT screen
3. To manually upload files, check each file individually and clip upload. To automatically upload files, click on the Automatic Upload checkbox.
4. If files are marked by a purple question mark or red and white X icons, please contact a technician.
Purple question mark: Cannot identify the file.
Red and white X icons: Contains file errors.
5. Upon upload, data is moved to C:\DATA\Archive. If upload is unsuccessful, data is automatically moved to C:\DATA\Error. Please contact the PP technician is this occurs.
Credits
Version 2 of this document was edited by T.Cobb during expedition 368 (2016). Credits for subsequent changes to this document are given in the page history.
All improvements to the Quick Start Guides and User Guides are a communal effort, with honorable mention to the group of LOs, ALOs, and technicians who have helped.
Archived Versions
- SHMSL Quick Start Guide - 27Sept2022
- LMUG-SHMSLQuickStartGuide v2016: An exported PDF version of this wiki page as of 2020-02-27.
- LMUG-SHMSLQuickStartGuide v2018: An exported PDF version of this wiki page as of 2020-10-24.
1 Comment
Unknown User (25dbb4e563432e130164eb68f519000c)
Reviewed by Nicolette 6 August 2018