| Table of Contents | ||
|---|---|---|
|
Sample Preparation
- Put carbon adhesive dot on a sample stub.
- Place sample on adhesive.
- For sputter coating please see the Sputter Coating Quick Start Guide
Start Microscope
1. Flip the 'On' switch on the right side of the microscope (Figure 1)
...
3. The SEM needs to be in an 'Air' state (not under vacuum). If only the blue light flashes, press the EVAC/AIR button. The microscope will take a minute to release the vacuum and fill with air. The process is complete when the 'Air' indicator light is solid yellow.
Put Sample in SEM
Adjust Sample Height
1.When the Air indicator is a solid yellow, grab the handle and pull open the door.
...
d. Double check the height is good.
Place in SEM
1.Open the door to the sample chamber
...
4. Click the EVAC/AIR button. The blue 'Evac' indicator lights will start to flash. Keep a hand pressed against the door while the vacuum is first starting up.
Capture Image
Open Software
1.Click the TM3000 software icon on the desktop (figure 5)
...
7. When done with the microscope select Stop in the upper left corner of the software.
File Naming Convention
Naming convention for SEM files:
...
NOTE: All files need to be moved to USERVOL and DATA1 by the end of the expedition.
Uploading Data
1.Open SEMUploader (Figure 7)
...
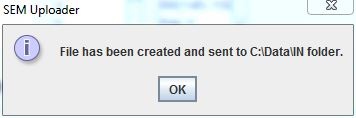
7. Click Upload. This creates the new .SEM file that will upload into the database. A message box pops up indicating the file has been created.
MUT Upload
1.Click on the MUT icon to open the software
...
The software can be left open in the background with the Automatic Upload box checked.
Archived Versions
| View file | ||||
|---|---|---|---|---|
|
| View file | ||||
|---|---|---|---|---|
|