
Sample Preparation
- Put carbon adhesive dot on a sample stub.
- Place sample on adhesive.
- For sputter coating please see the Sputter Coating Quick Start Guide
Start Microscope
1. Flip the 'On' switch on the right side of the microscope (Figure 1)

Figure 1. SEM On Switch
2. The SEM will flash the yellow 'Air' and blue 'Evac' status indicator lights and then resume the last operation it was under when turned off, likely the Evac command.
3. The SEM needs to be in an 'Air' state (not under vacuum). If only the blue light flashes, press the EVAC/AIR button. The microscope will take a minute to release the vacuum and fill with air. The process is complete when the 'Air' indicator light is solid yellow.
Put Sample in SEM
Adjust Sample Height
1.When the Air indicator is a solid yellow, grab the handle and pull open the door.
2. Using the red Hex Key, turn the set screw about half a turn to loosen the sample stage (Fig 2). Do not unscrew too much or the set screw could fall out.

Figure 2. Interior of SEM sample area. Hex Key showing location of Set Screw
3. Pull the Sample Stage out (Fig 3). Close the door to keep dust out.

Figure 3. Sample Stage being removed
4. Place the sample stage in the black Specimen Height Adjuster tool (Fig 4). The height of sample screw can be adjusted via the two lock nuts, A and B, in the figure below.
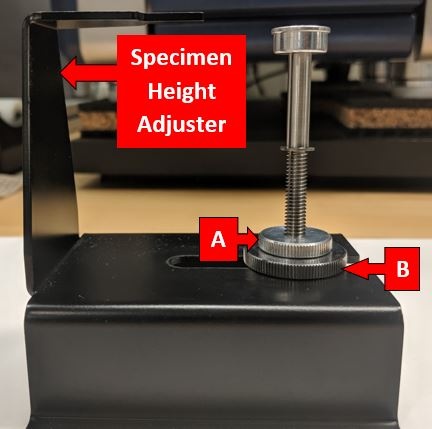
Figure 4. Specimen Height Adjuster with sample stage. A: Top locknut B: Bottom locknut
5. The goal is to have the stub/sample 0.5mm - 1.0mm below the black bar. This bar represents the height of the door seal. If the stub is touching the black bar on the height adjuster then it will hit the door seal. If the height is too low the sample will be outside of the focusing circle for the electron beam and the image will be unable to focus.
a. Loosen Locknut A
b. Turn the threaded sample screw to raise or lower the height.
c. When the sample stub is just below the black bar, retighten locknut A.
d. Double check the height is good.
Place in SEM
1.Open the door to the sample chamber
2. Put the sample assembly back in the hole.
3. Tighten the set screw using the hex key. Hand tight is sufficient.
4. Click the EVAC/AIR button. The blue 'Evac' indicator lights will start to flash. Keep a hand pressed against the door while the vacuum is first starting up.
Capture Image
Open Software
1.Click the TM3000 software icon on the desktop (figure 5)

2. While the SEM pumps down to vacuum the software will display this status screen.
3. When the machine is fully under vacuum the start up screen opens (Figure 6). Note the screen will appear black at first. The electron beam gun is not activated until a user presses Start.
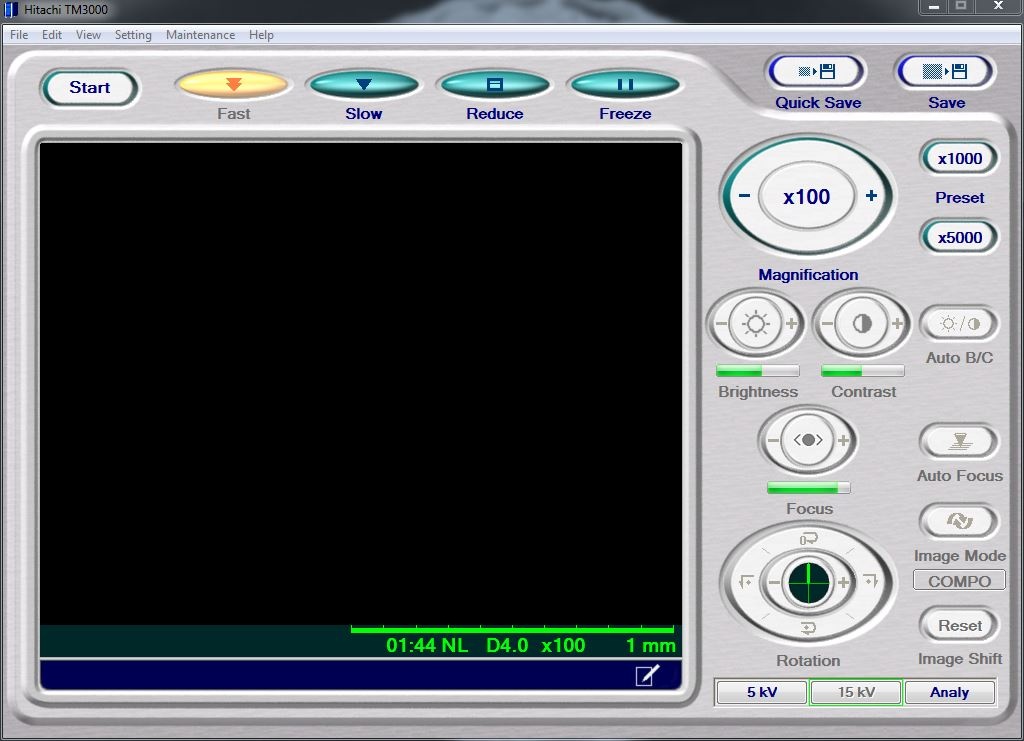
Below are the tools available in the software:
- Start: Turns on the high voltage which generates an electron beam. Must press start to generate an image.
- Fast: Image updates quickly. Useful to select 'Fast' while changing Field of View.
- Slow: Image updates slowly. If in calm sea state, can produce a higher quality image.
- Reduce: Takes just the center portion of the screen to update.
- Freeze: Stops updating the image and preserves the image as it was at the time of pressing Freeze.
- Magnification: Control to increase or decrease magnification. Ranges from x40 to x30,000.
- Auto B/C: Click this to automatically adjust the brightness and contrast of the image.
- Auto Focus: Click this to automatically focus the image.
- 5 kV / 15 kV / Analy: Sets the beam voltage between either 5kV, 15kV, or Analy
- Quick Save: Saves the current image on the screen. Captures a lower resolution image of 640x520 pixels.
- Save: Re-captures the image and saves it at a higher resolution image of 1280x1040 pixels.
4. Press Start
5. Navigate around using the control knobs on the front of the SEM.
6. When ready to save an image select Quick Save for low resolution images (also good during high seas) or Save for high resolution images (good during calm seas).
7. When done with the microscope select Stop in the upper left corner of the software.
File Naming Convention
Naming convention for SEM files:
- EXP number
- Site
- Hole
- Core
- Section
- Sample
- Taxa/specimen/piece
- No. 1, 2, 3…
E.g.
349_U1431A_1H_1_10-11cm_Emiliania_huxleyi_1,
349_U1431A_1H_1_10-11cm_Emiliania_huxleyi_2,
349_U1431A_1H_1_10-11cm_Emiliania_huxleyi_3, …
Storage convention for SEM files on the local PC:
- SEM
- Site
- Hole
- Sample
E.g.
Folder SEM
Folder 1431
Folder 1341A
Folder U1341A_1_H_1_1-11cm (all files for this SEM sample)
NOTE: All files need to be moved to USERVOL and DATA1 by the end of the expedition.
Uploading Data
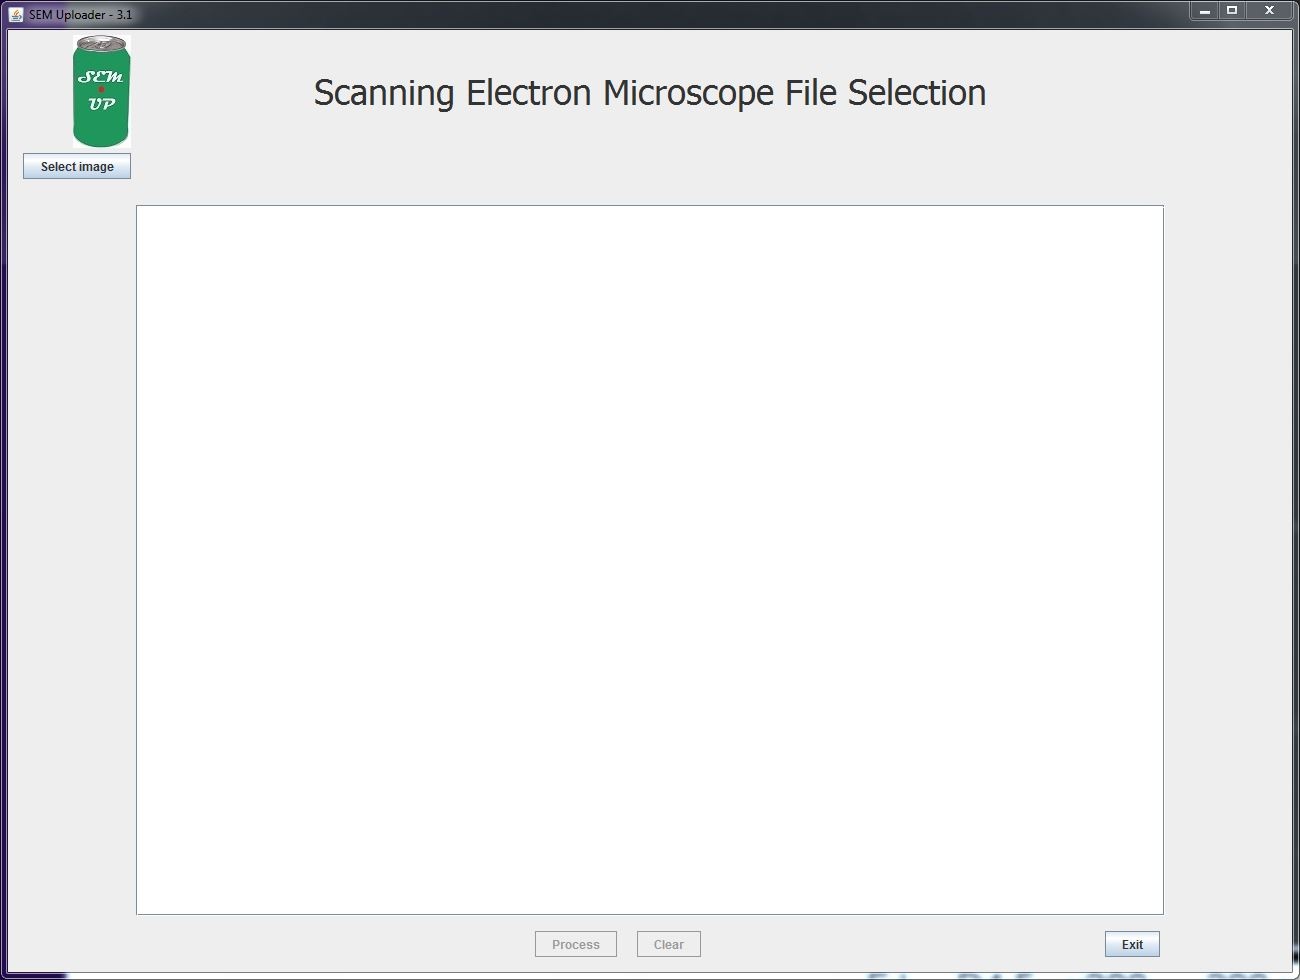
1.Open SEMUploader (Figure 7)

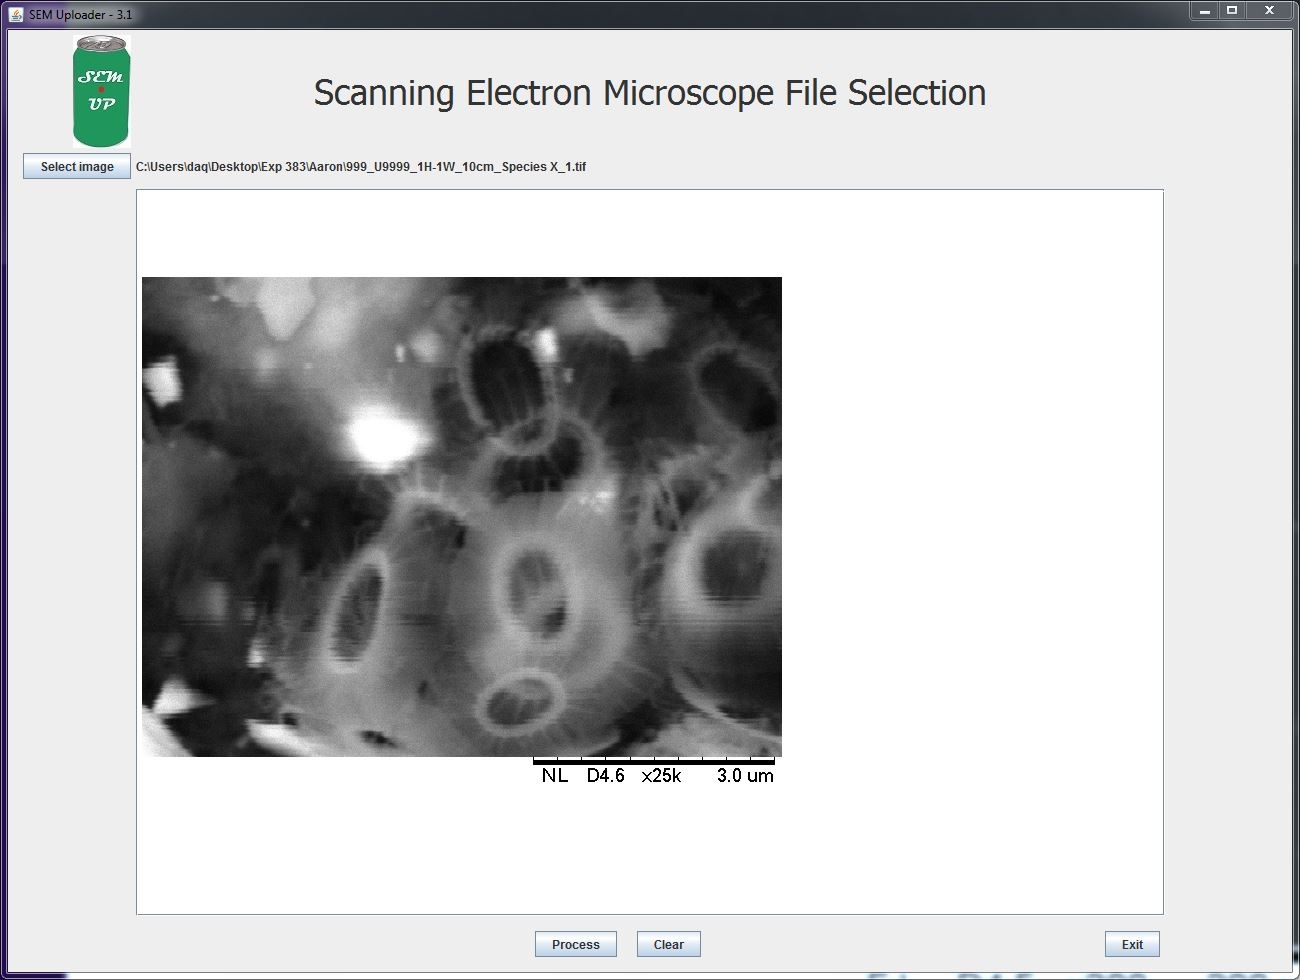
2. The Main Window opens up (Figure 8). Click Select Image in the upper left corner.
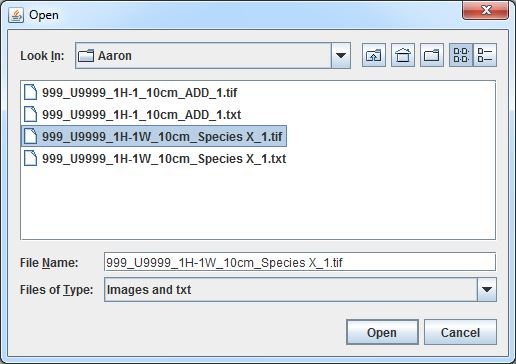
3. Navigate to the images and select the desired .tif file.
4. The image populates the screen. Click Process to move forward. OR click Exit if you decide to upload later. CLEAR will clear out the image from the selection. The user can select another image right away if the one chosen is not the one that they wanted to upload.
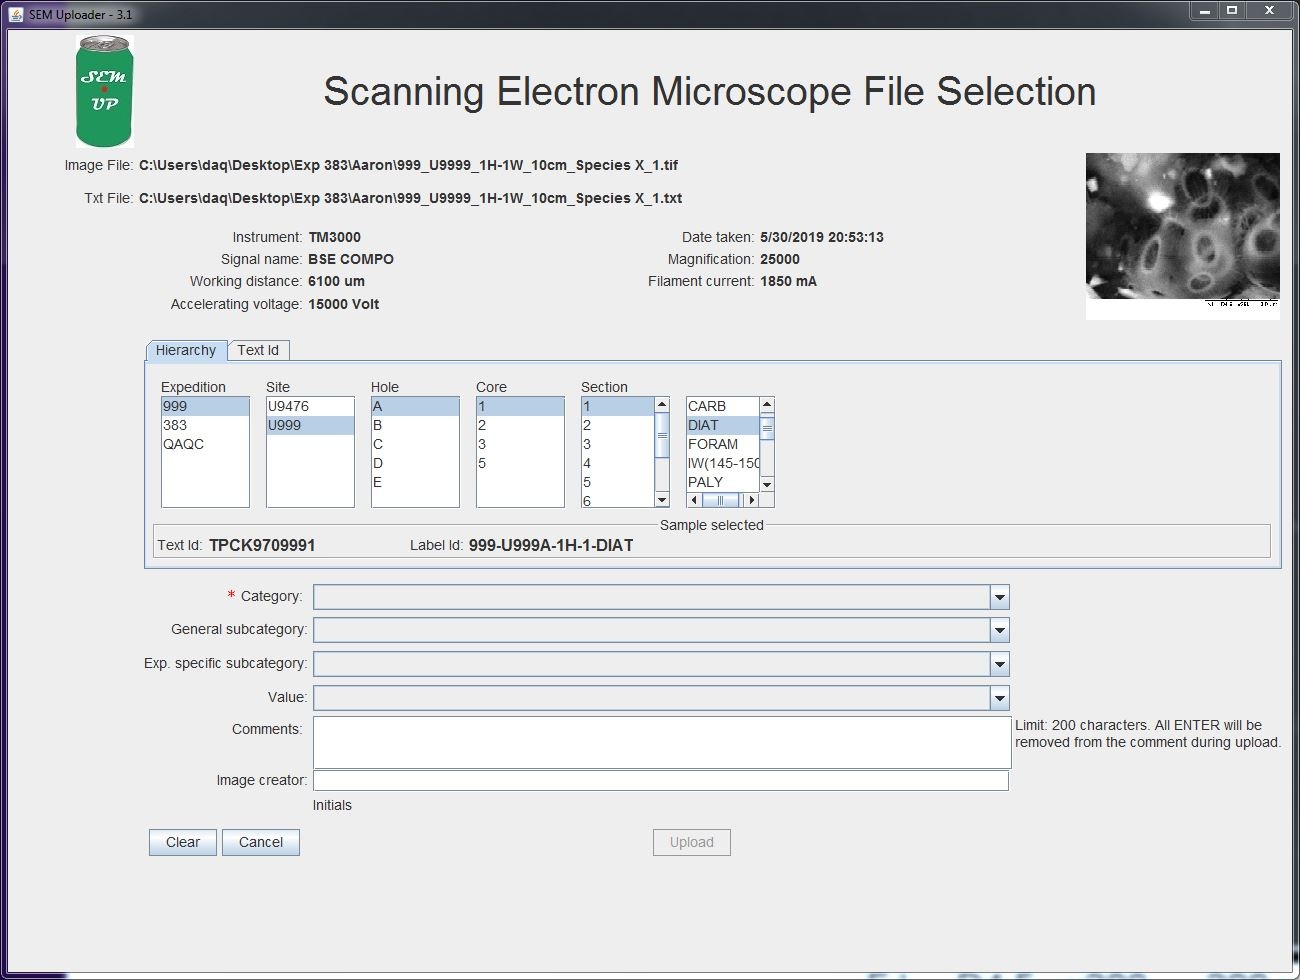
5. After clicking Process the sample information window appears. In this window we can assign a sample to the image and text files. The image can be assigned to a sample id either through the Hierarchy tab or the Text Id Tab. Use the Hierarchy entry by clicking through the appropriate Expedition, Site, Hole, Core, and Section. The samples off the section will pop up after the other fields have been entered. To use the Text Id entry type in the Text Id of the Sample and Click Validate Text Id.
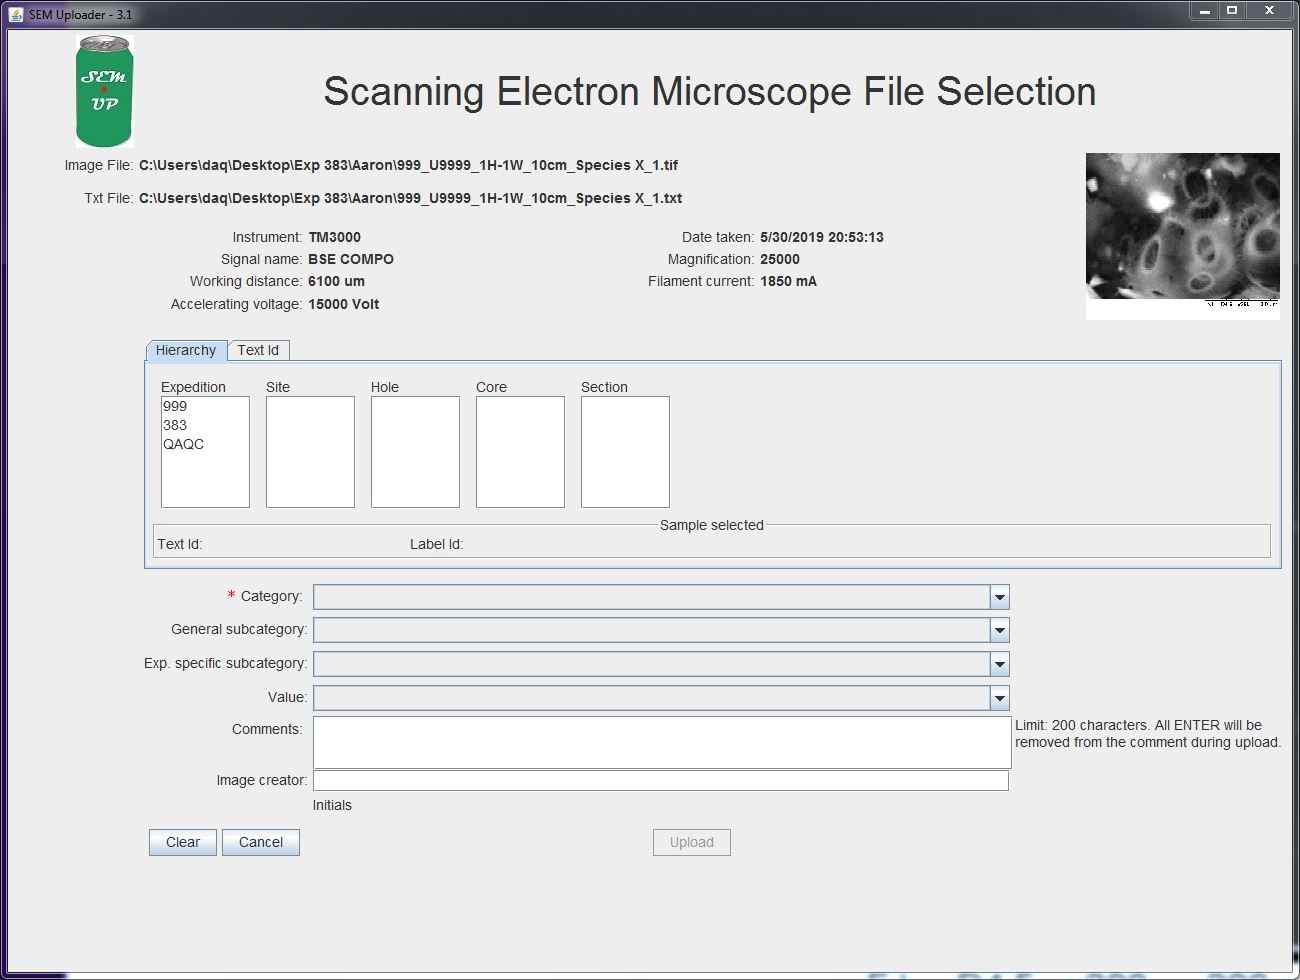
6. After the sample has been selected go through teh drop down lists below. Only the Category Field is required. Below the the categories are described:
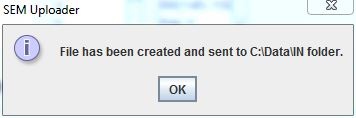
7. Click Upload. This creates the new .SEM file that will upload into the database. A message box pops up indicating the file has been created.
MUT Upload
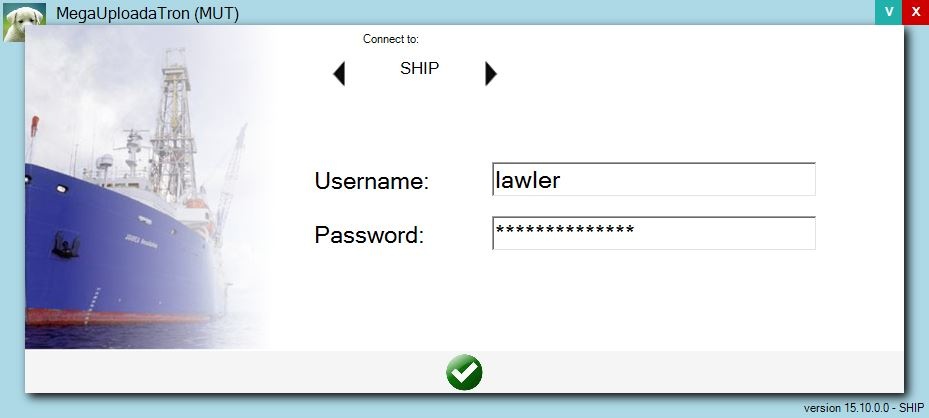
1.Click on the MUT icon to open the software
![]()
2. Login to MUT with your LIMS applications username and password.
3. The files should populate when MUT opens.

4. Click Upload.
The software can be left open in the background with the Automatic Upload box checked.