Sample Preparation
- Put carbon adhesive dot on a sample stub.
- Place sample on adhesive.
- For sputter coating please see the Sputter Coating Quick Start Guide
Start Microscope
1. Flip the 'On' switch on the right side of the microscope (Figure 1)

Figure 1. SEM On Switch
2. The SEM will flash the yellow 'Air' and blue 'Evac' status indicator lights and then resume the last operation it was under when turned off, likely the Evac command.
3. The SEM needs to be in an 'Air' state (not under vacuum). If only the blue light flashes, press the EVAC/AIR button. The microscope will take a minute to release the vacuum and fill with air. The process is complete when the 'Air' indicator light is solid yellow.
Adjust Sample Height
1.When the Air indicator is a solid yellow, grab the handle and pull open the door.
2. Using the red Hex Key, turn the set screw about half a turn to loosen the sample stage (Fig 2). Do not unscrew too much or the set screw could fall out.

Figure 2. Interior of SEM sample area. Hex Key showing location of Set Screw
3. Pull the Sample Stage out (Fig 3)

Figure 3. Sample Stage being removed
4. Place the sample stage in the black Specimen Height Adjuster tool (Fig 4). The height of sample screw can be adjusted via the two lock nuts, A and B, in the figure below.
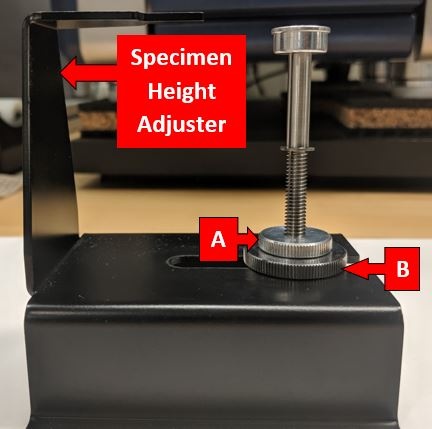
Figure 4. Specimen Height Adjuster with sample stage. A: Top locknut B: Bottom locknut