Microscope Introduction
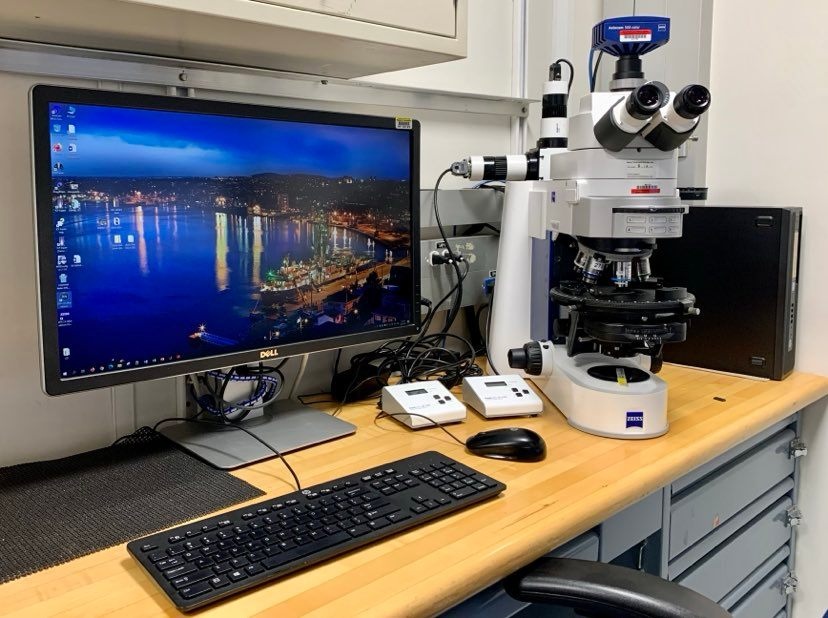
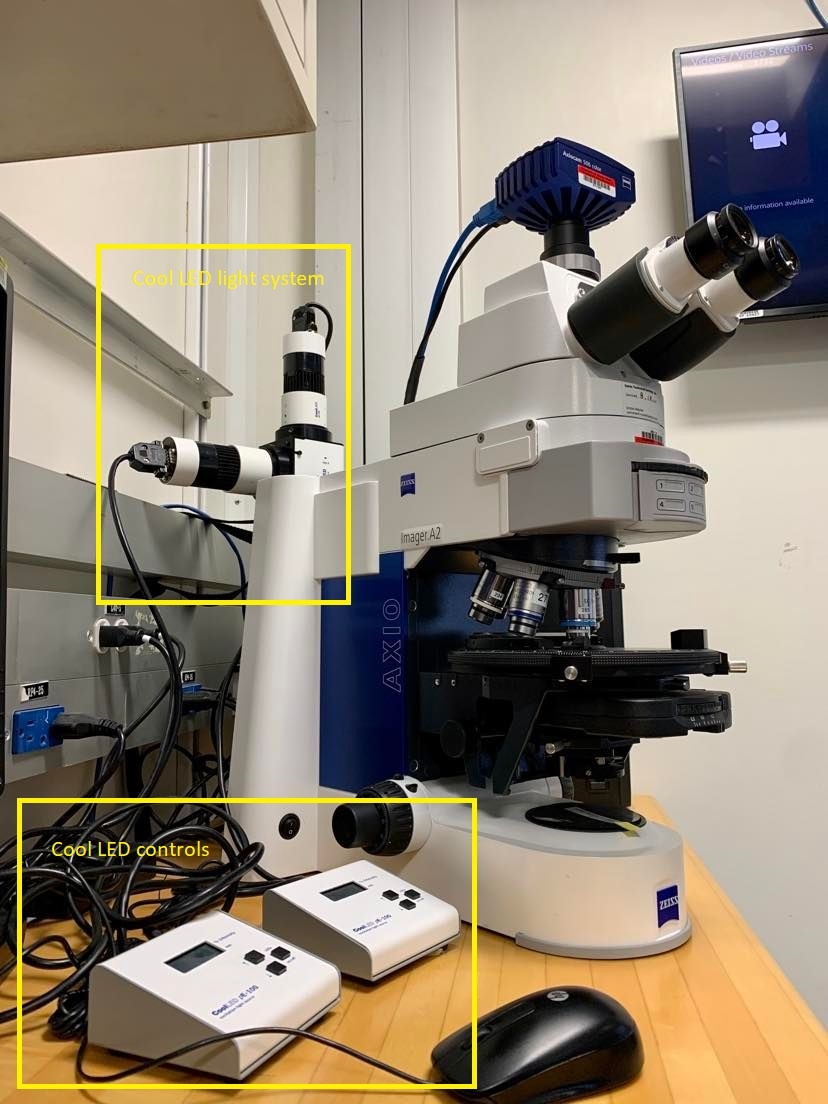
The Epifluorescence microscope in the microbiology laboratory aboard the JOIDES Resolution consists of a Zeiss Axio Imager 2 microscope with transmitted and reflected capabilities, as well as a CoolLED pE-100 single wavelength illumination system for screening fluorescence. The microscope is furthermore outfitted with a Zeiss 506 camera and the ZEN blue image capture software.
Cool lights usage
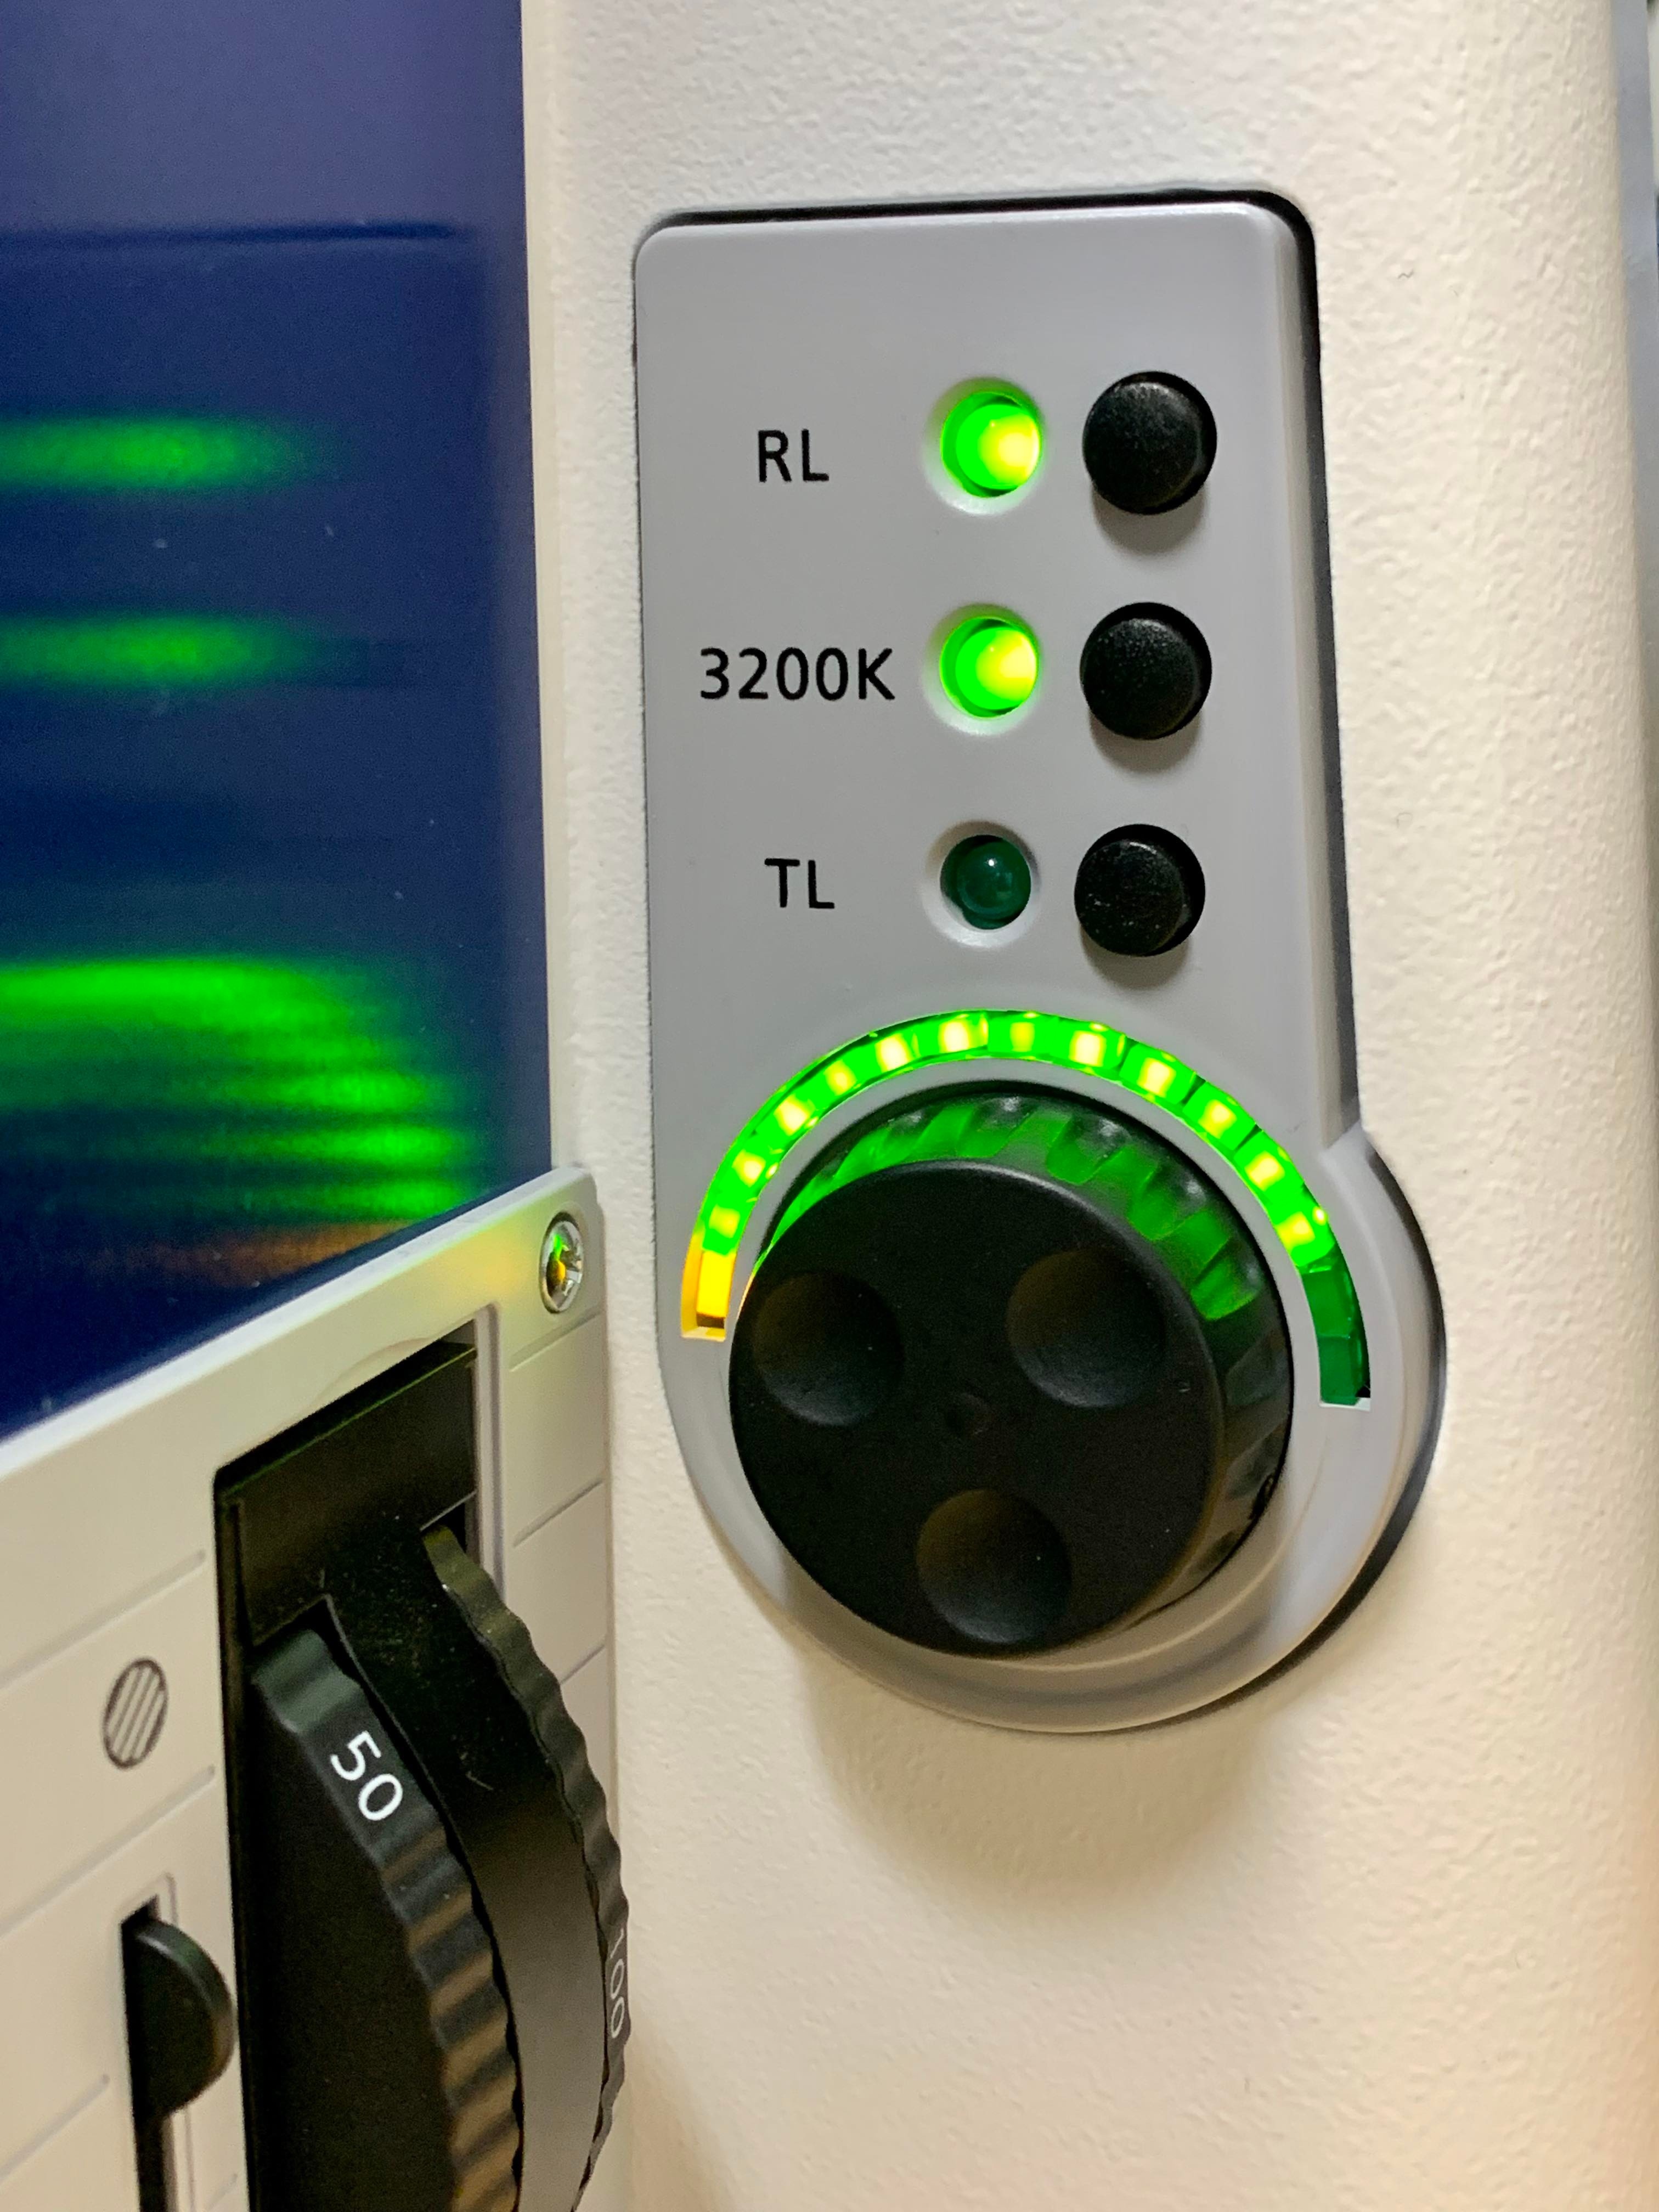
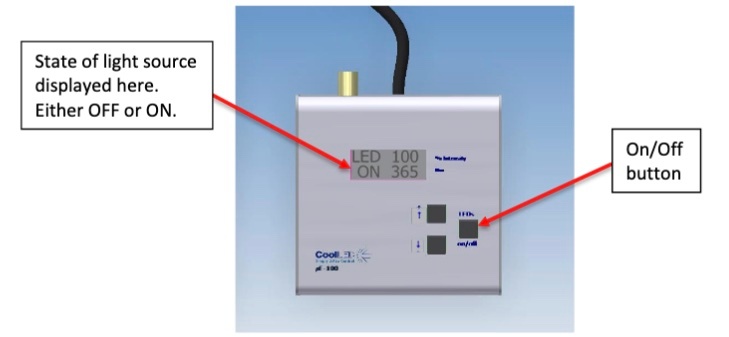
First, switch on the microscope lights (picture 1) and select RL/3200 K (picture 2), and turn on the CoolLED lights (picture 3):
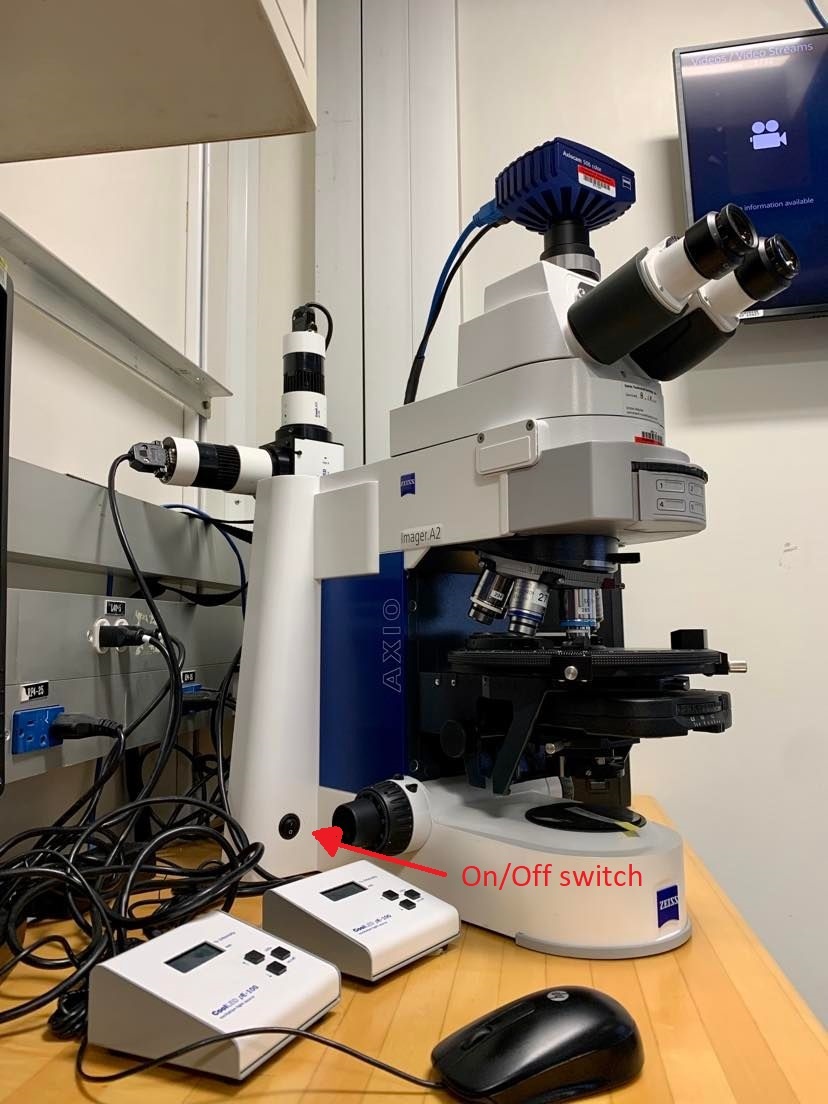
LEDs are switched on and off by pressing the ‘on/off’ button located on the left side of the microscope. At start-up the pE100 light source will revert to the same settings that were set when it was last powered down. New light sources are supplied with the settings as shown below.
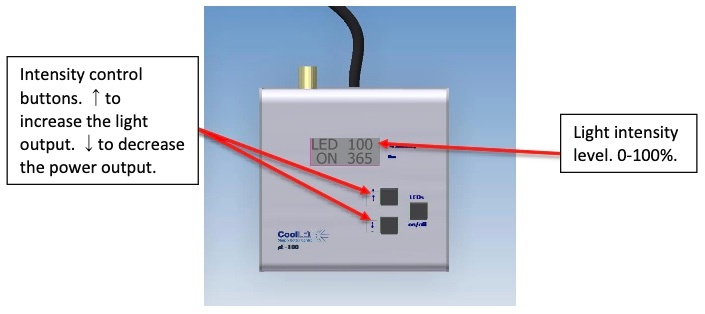
Adjust the intensity of the pE100 light source by pressing the up and down intensity buttons. This is displayed in 1% steps between 20% and 100%. Between 0% and 20% this figure is displayed in 0.2% intensity steps. The number next to the ON/OFF represents the wavelength in nm that the light is producing.
Camera/Imaging
The microscope has a Zeiss 506 color camera attached and has Zen lite software installed. The sensitivity of the camera is based on a 6 megapixel CCD sensor and has a resolution of 2752 horizontal pixels × 2208 vertical pixels.

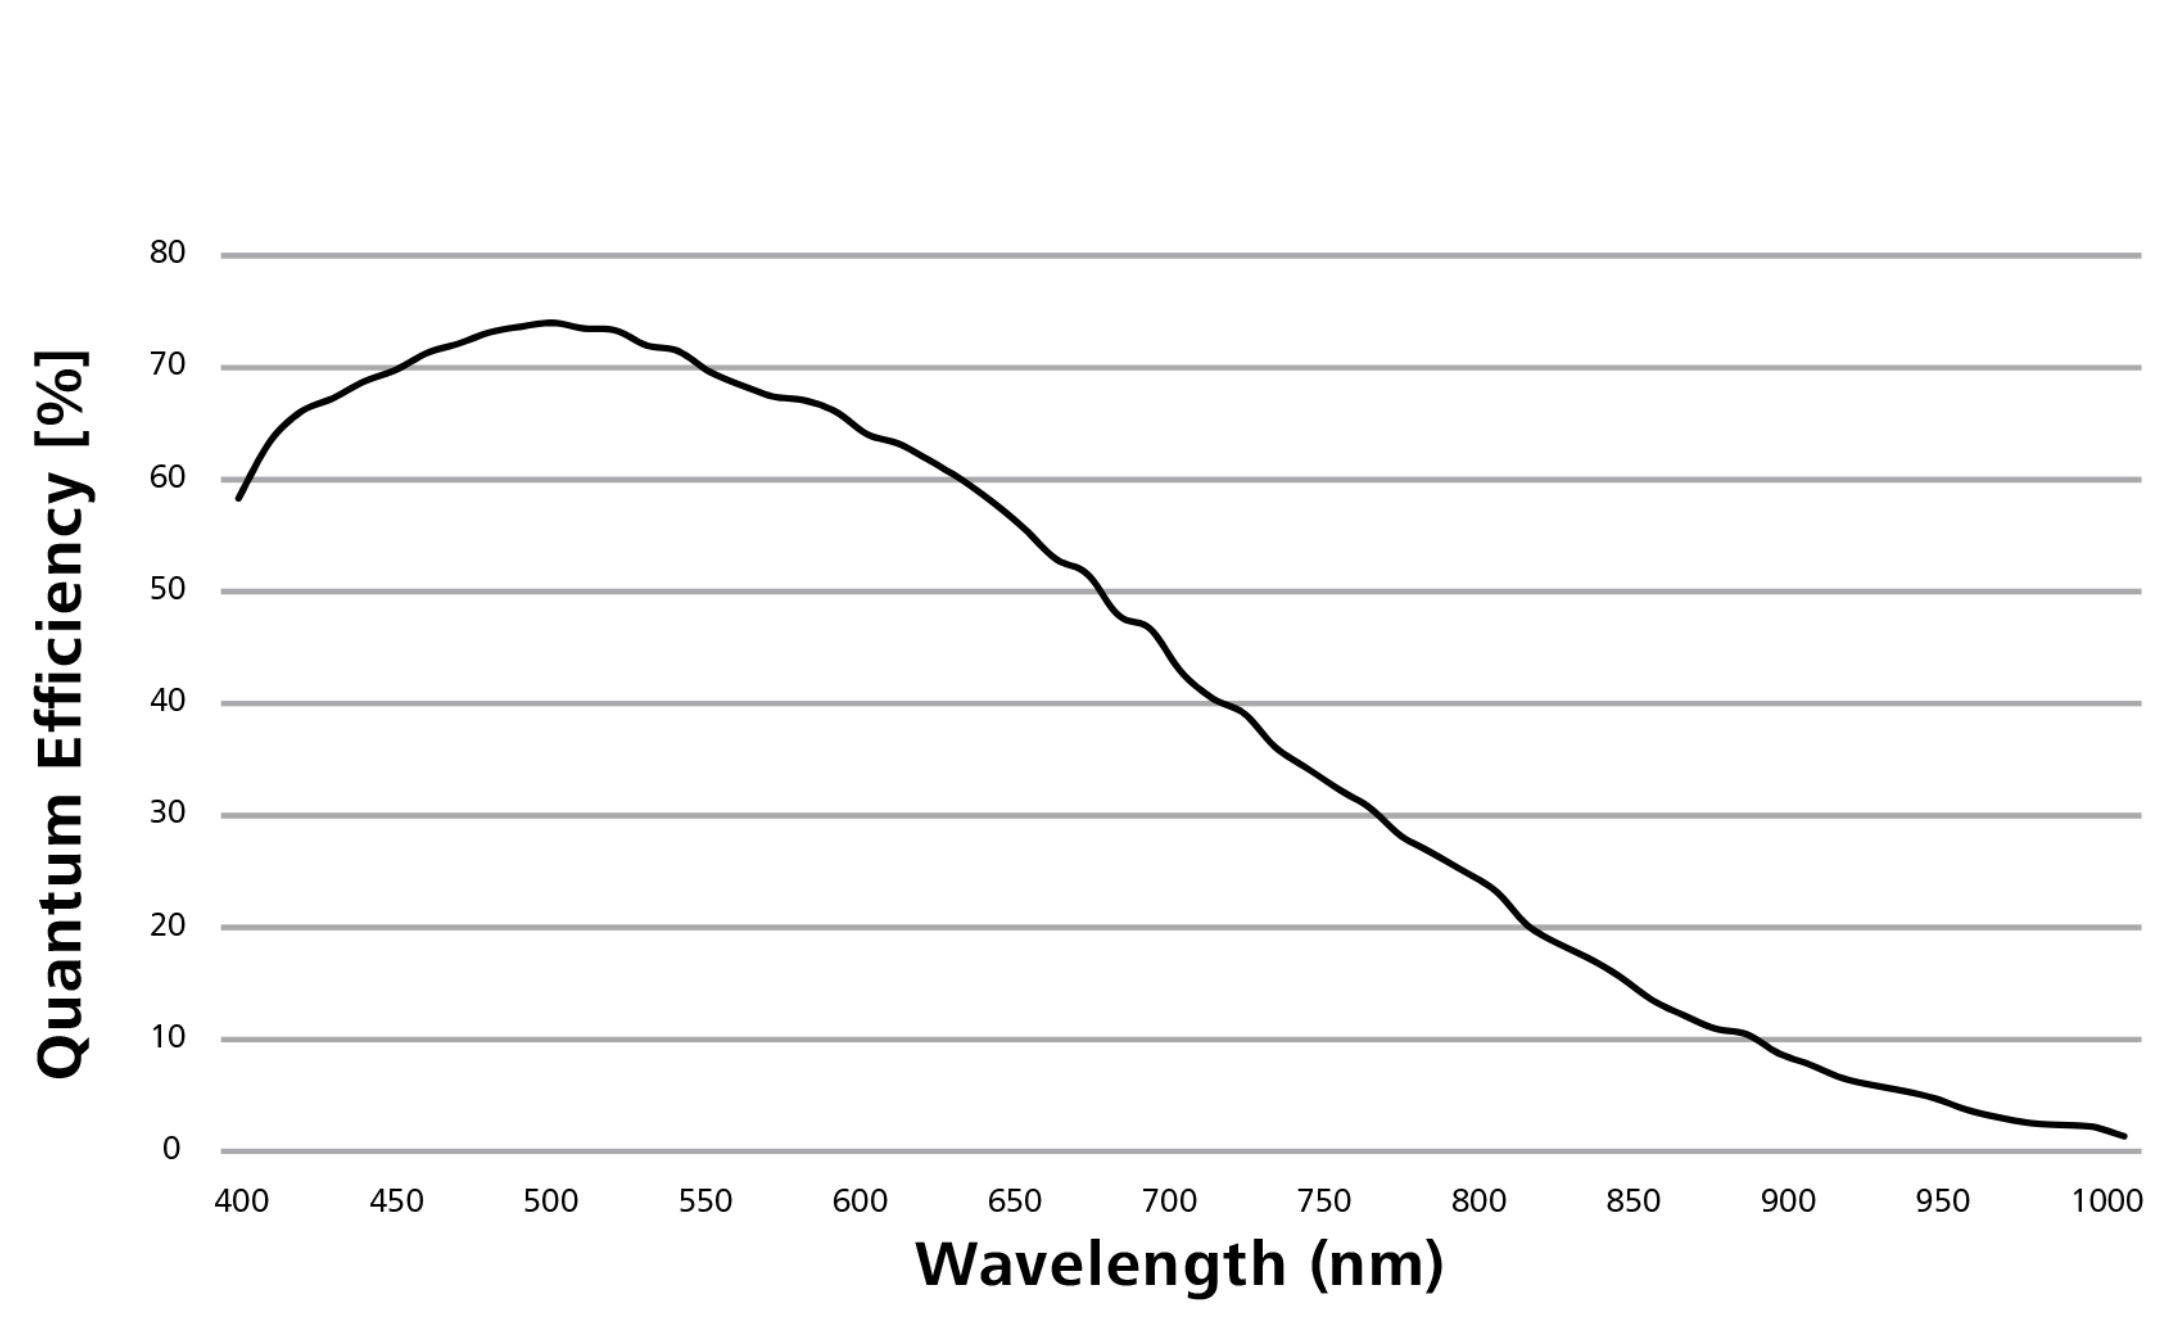
(Graph source: zeiss.com)
Zen blue (image acquisition software)
1) Find either the desktop or toolbar Zen button after the camera is plugged in and click it to open.
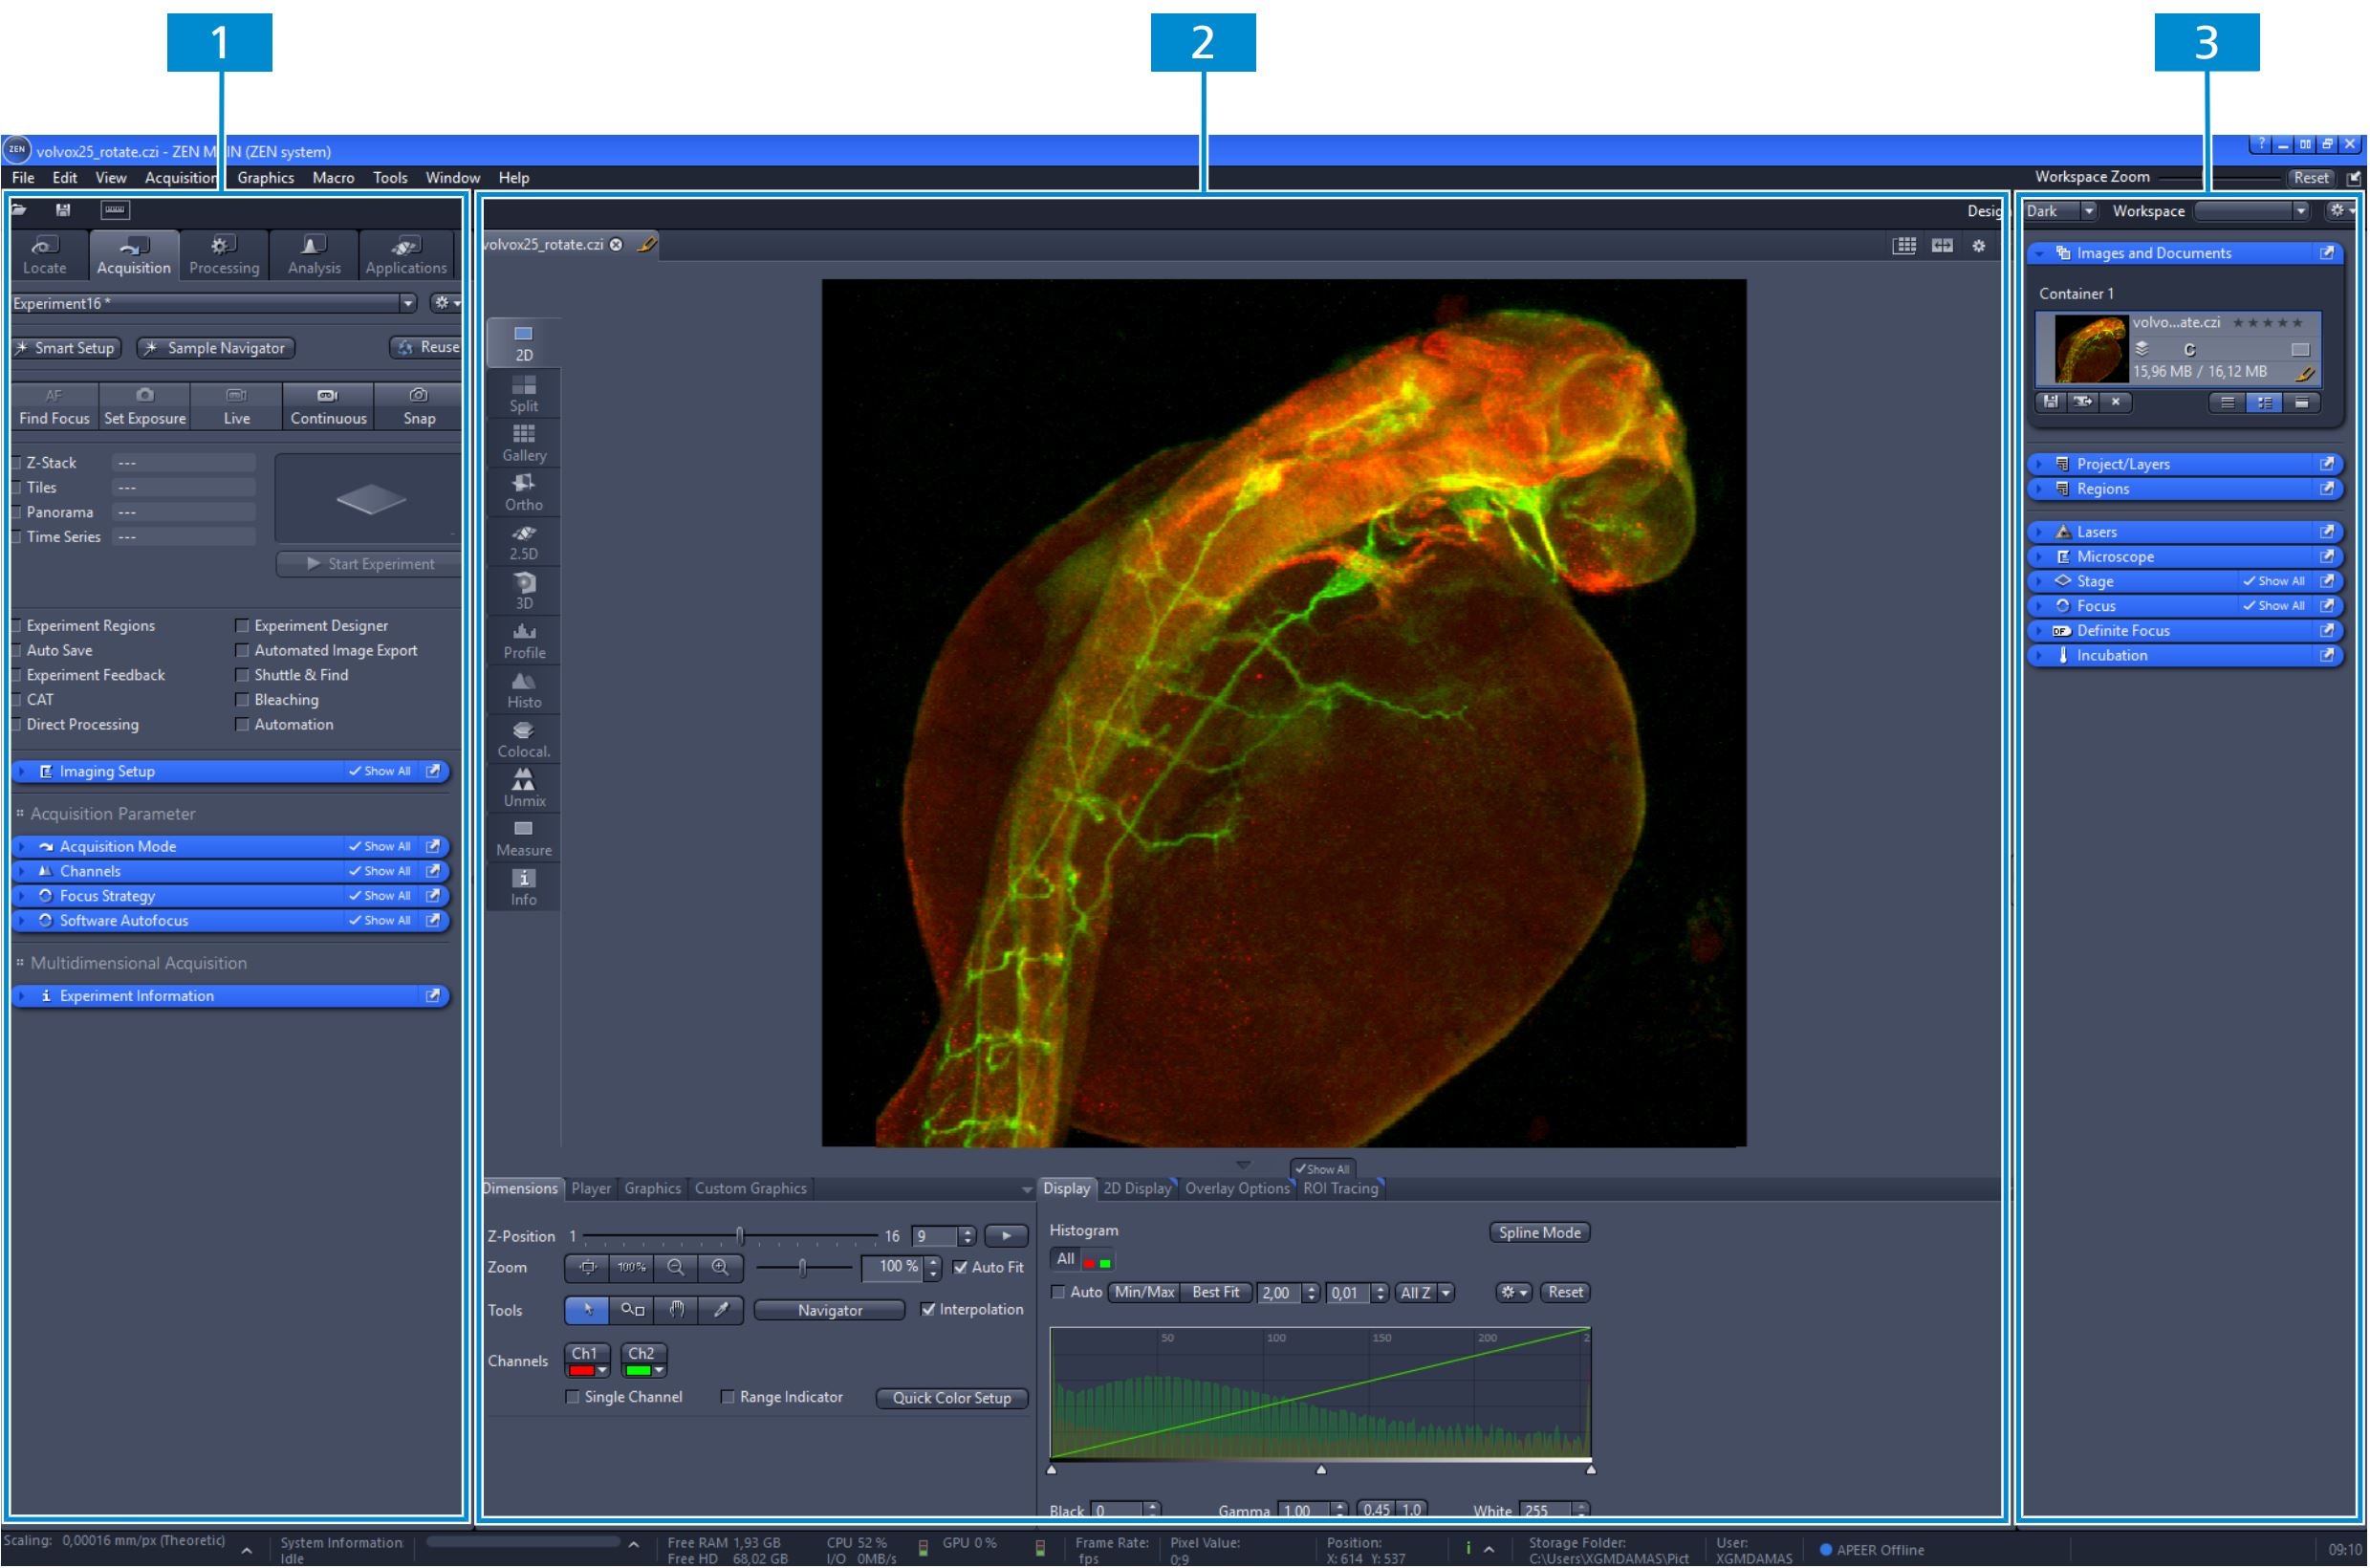
2) This is the user interface:
1 - Left Tool Area: With the tabs you can access all the main tools for microscope control (Locate Tab), acquisition (Acquisition Tab), image processing (Processing Tab), image analysis (Analysis Tab), and applications (Applications Tab).
2 - Center Screen Area: This area is used to display your images with several image views available.
3 - Right Tool Area: Here you find the Images and Documents Tool, the Objective Selection and the Stage and Focus controls.
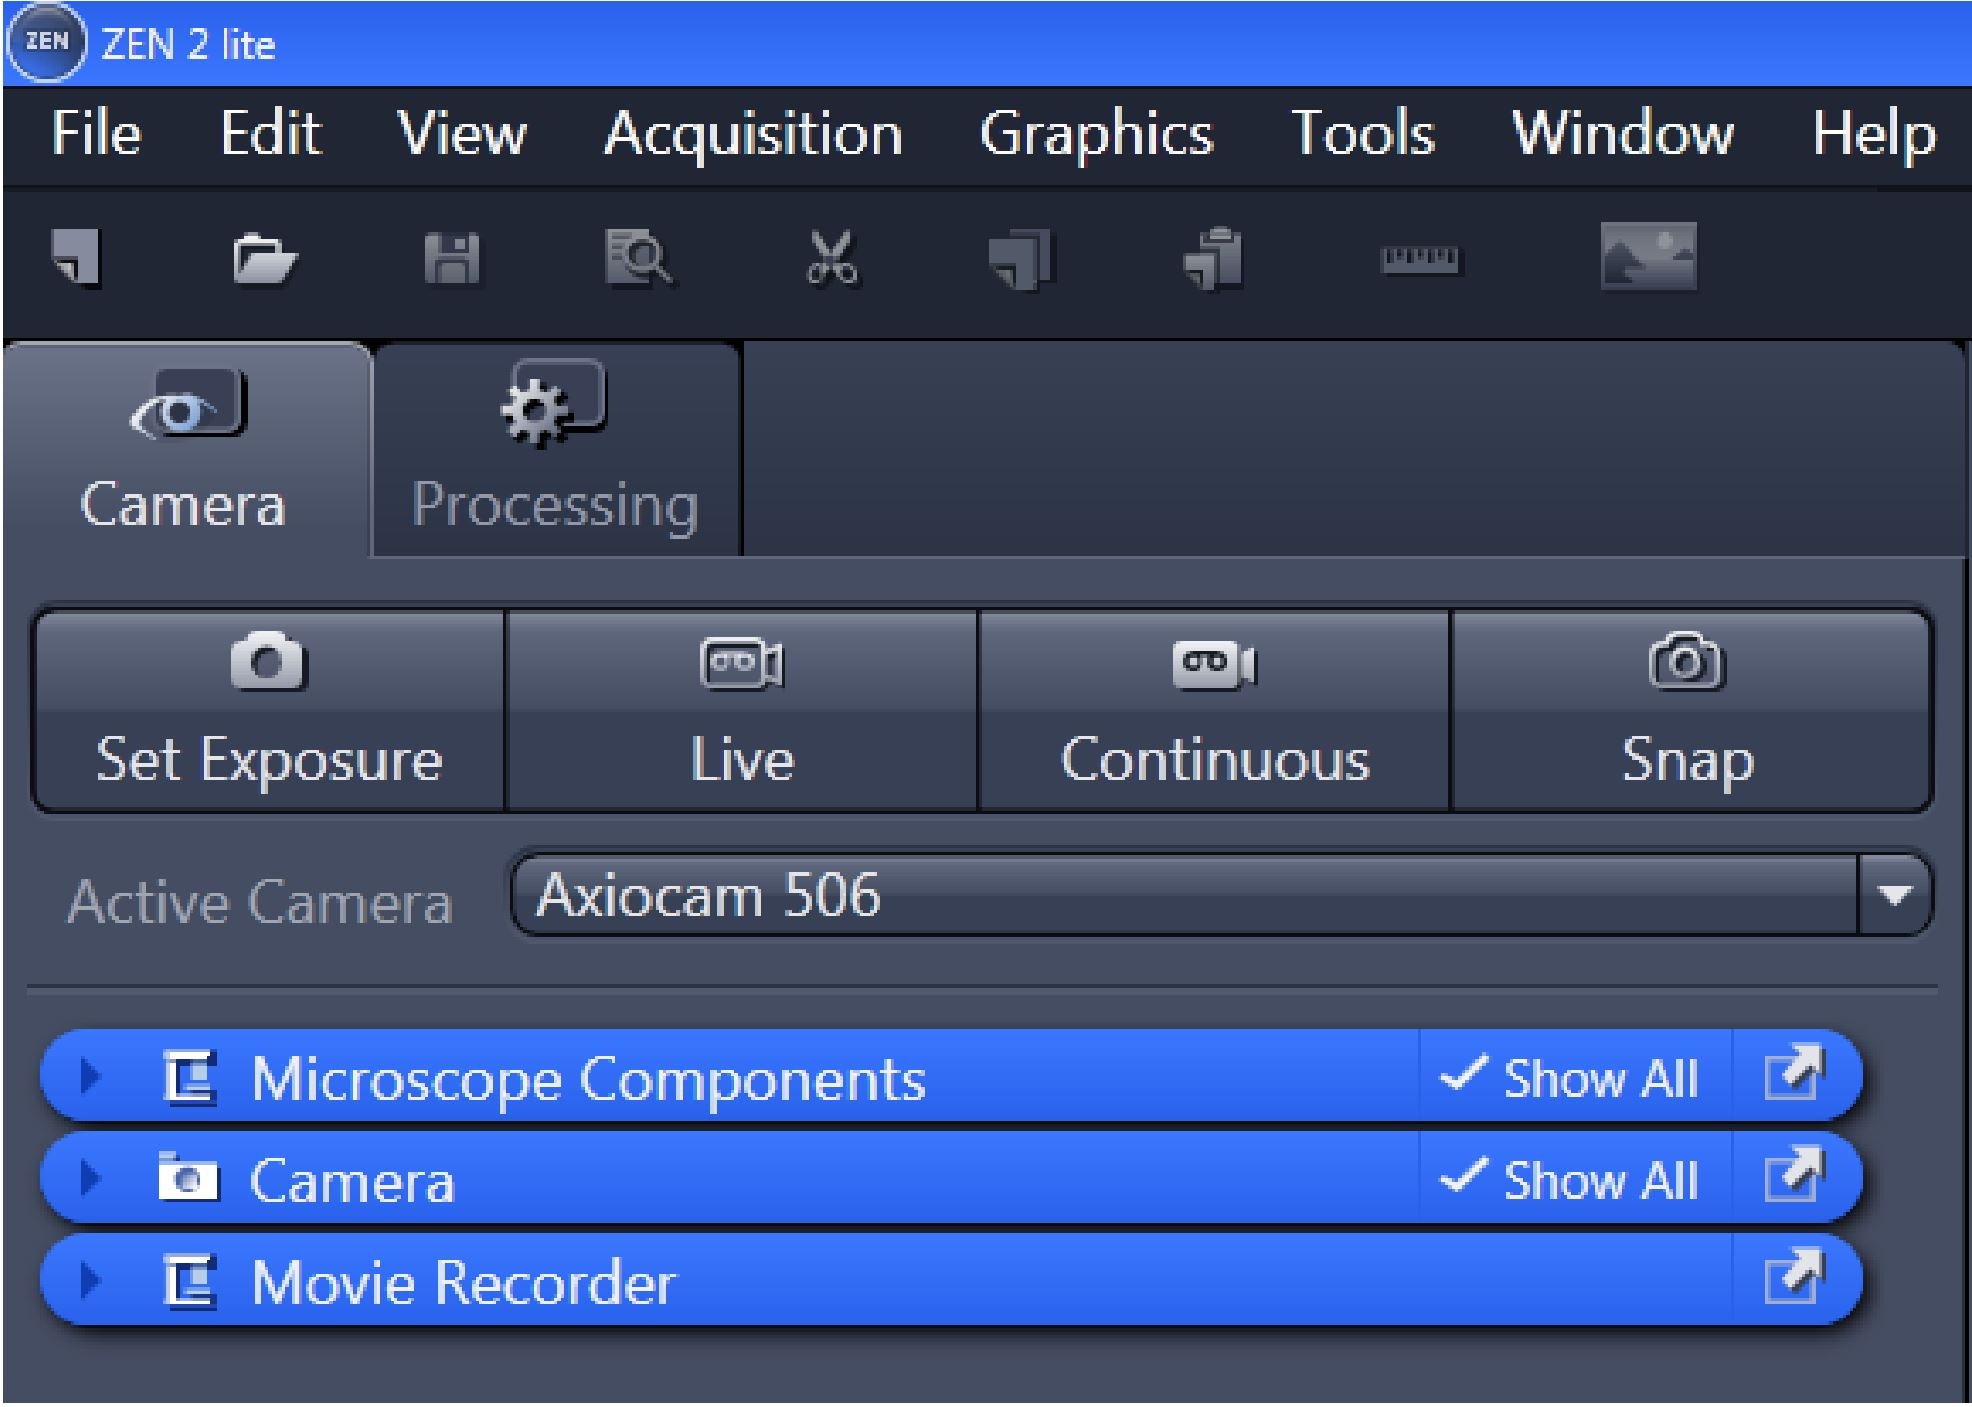
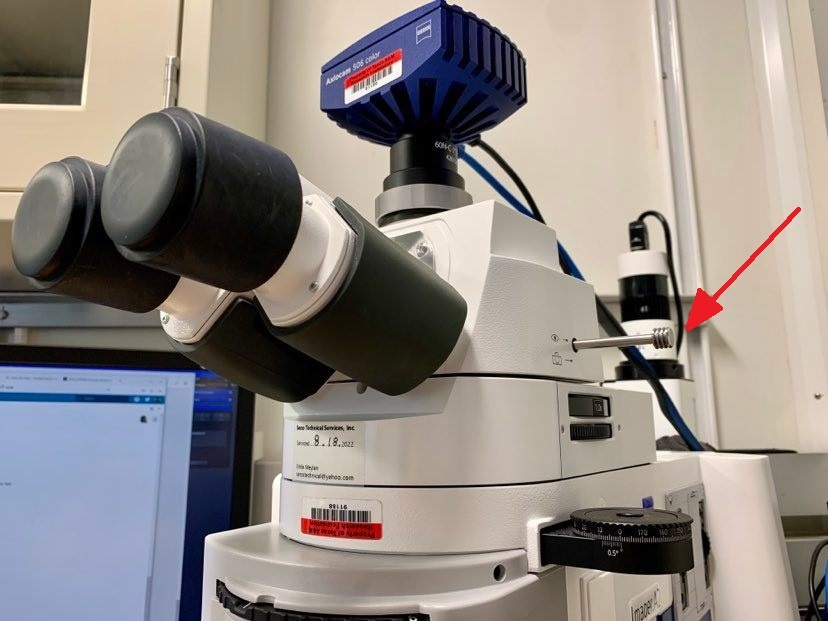
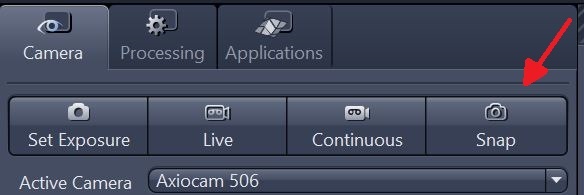
3) On the left side in the tool area, the Set exposure/Live/Continuous and Snap options will become active a few seconds after opening the software. Click Live, be sure to set the microscope light path to the camera (see picture below). A live image will be displayed in the center area of Zen blue.
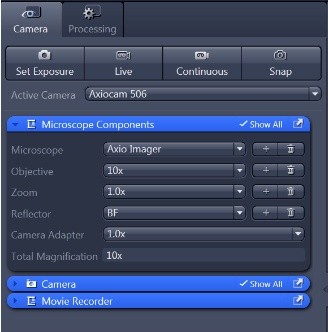
4) In the Left Tool area the user can set all microscope components to the current microscope settings (objective etc.) in order for the metadata to be saved once ready for image acquisition.
Comment: any suggestions for "correct settings"? Like what objective for which purpose? I think you mean "desired settings"?
5) In the same tool area to the left, the camera settings can be adjusted (exposure time, white balance etc.).

Comment: Suggestions? For instance, an exposure time of XX s would be preferable for blabla.
Screenshot of the camera settings, like you did above for the Microscope components?
I see on the screenshot "Movie Recorder". Is it possible to take a video while moving the sample? If so, maybe you can write something about it if this is a nice/interesting/useful feature of the microscope?
6) When ready, click Snap. The software will take a picture and display it as .czi file in the central screen area.
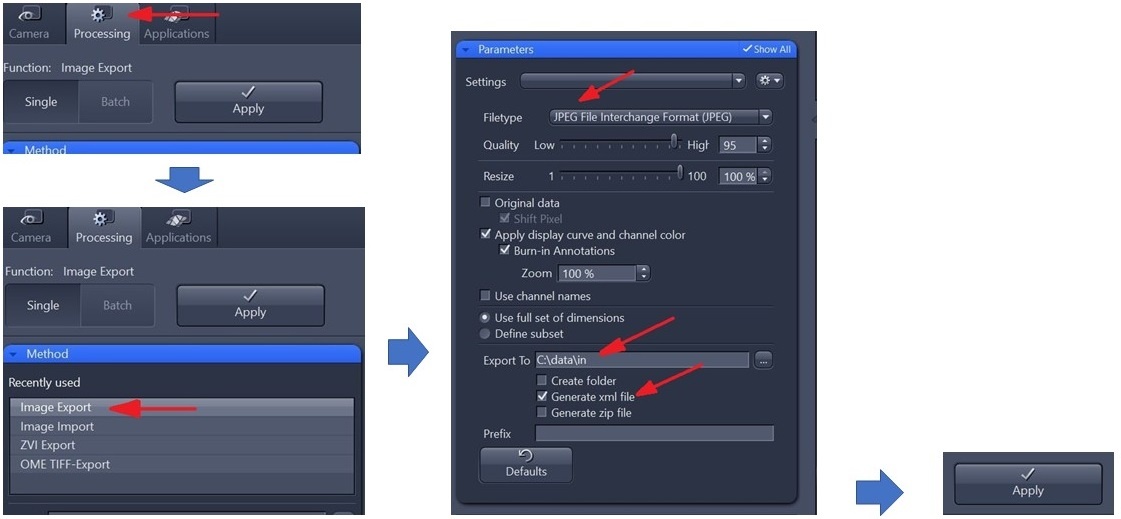
7) In the Processing tool, pick the Method Image Export and select JPEG or TIFF (Compression: None) filetype, Export to C:\data\in and Generate xml file, then click Apply. When the user closes the program, the user will be asked if the original .czi file should be saved as well - please confirm and save in the same folder.
Comment: What is the difference between Single and Batch? (I get it, but it would be nice to have some info, if feasible, on how to export a batch of images)
Is there any other image filetype available? Why jpeg? Why not the other filetypes? If this is an uploader thing, maybe you can write it down - so that the user does not save all images in another format and then the future upload does not work....
Question because I do not know: is. czi an image type? Could .czi be open by Illustrator so the scientists can play with the image/data? And then back to the issue: but they do not have Illustrator ![]()
8) IODP is developing an uploader tool for these images. Until then, save the images on Uservol/Microbiology/Microscope_images.
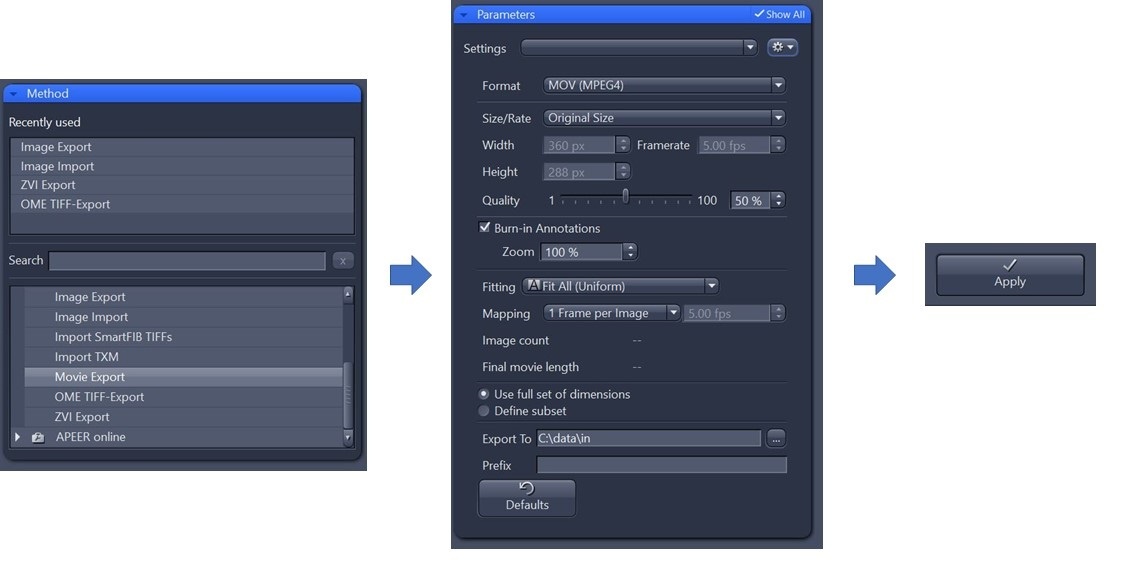
Movie recording feature:
It is possible to record a MOVIE (Continuous) of moving around on the slide. There is no automatic stepper installed on this microscope. The user has to move X- and Y-Axis by hand when the movie is recorded. It will cause the movie to be fuzzy during the movement, but might pose a good solution to capture a high level overview.
To capture a movie, follow steps 1) - 5) and:
6) Click Continuous instead of Snap. The recording starts and the Continuous button changes into a STOP button. Move around the slide as desired, then click STOP to finish recording.
7) In the Processing tool, pick the Method Movie Export and select MOV (MPEG4) filetype, Export to C:\data\in, then click Apply. When the user closes the program, the user will be asked if the original .czi file should be saved as well - please confirm and save in the same folder.